On this page9 sections
To set up automated messages on Airbnb, open your inbox, click the settings icon, and choose Manage quick replies. Write your message, pick which listings it's for, then set when it sends, like 1 day before check-in. Airbnb then sends it to every guest on its own. It takes about two minutes.
TL;DR
#- On Airbnb, automated messages are called quick replies. You find them in Messages, under the settings icon.
- Each quick reply has three parts: the message, the listings it's for, and when it sends.
- Blue fields, like the guest's first name, fill themselves in for each guest.
- Airbnb only sends these to guests who booked on Airbnb. To send the same messages to guests from Booking.com, Vrbo and your own website, you can use Host Port (Steps 5 to 7).
Prefer to watch? Here's the whole guide as a video.
Step 1: Open your quick replies
#-
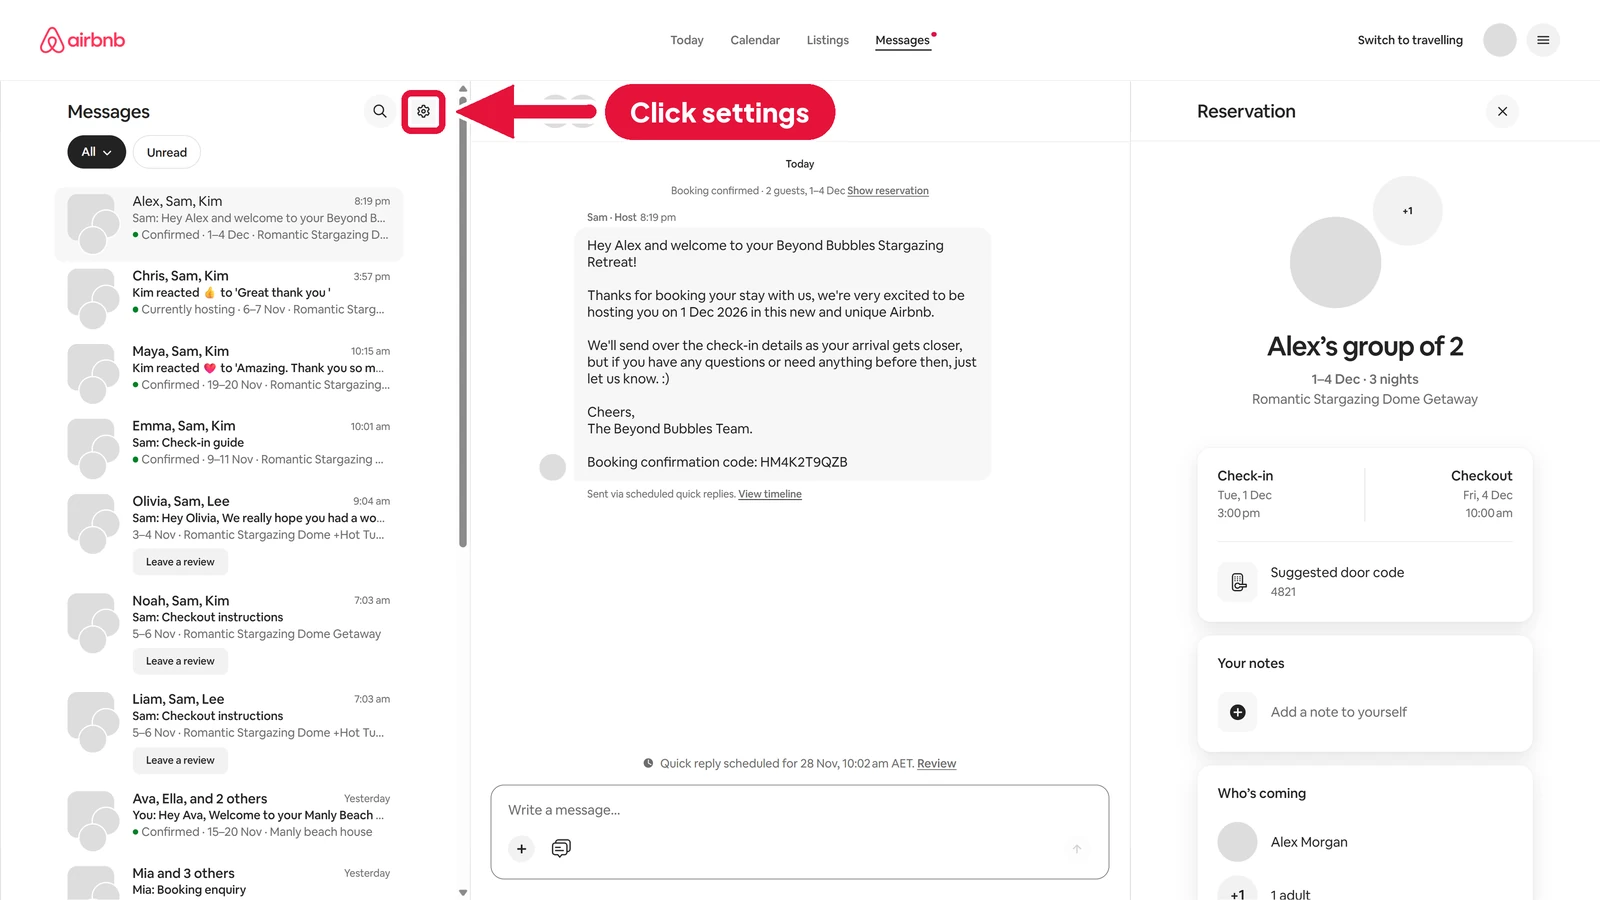
Go to Messages on Airbnb. Above your list of chats, click the settings icon (the little cog).
-
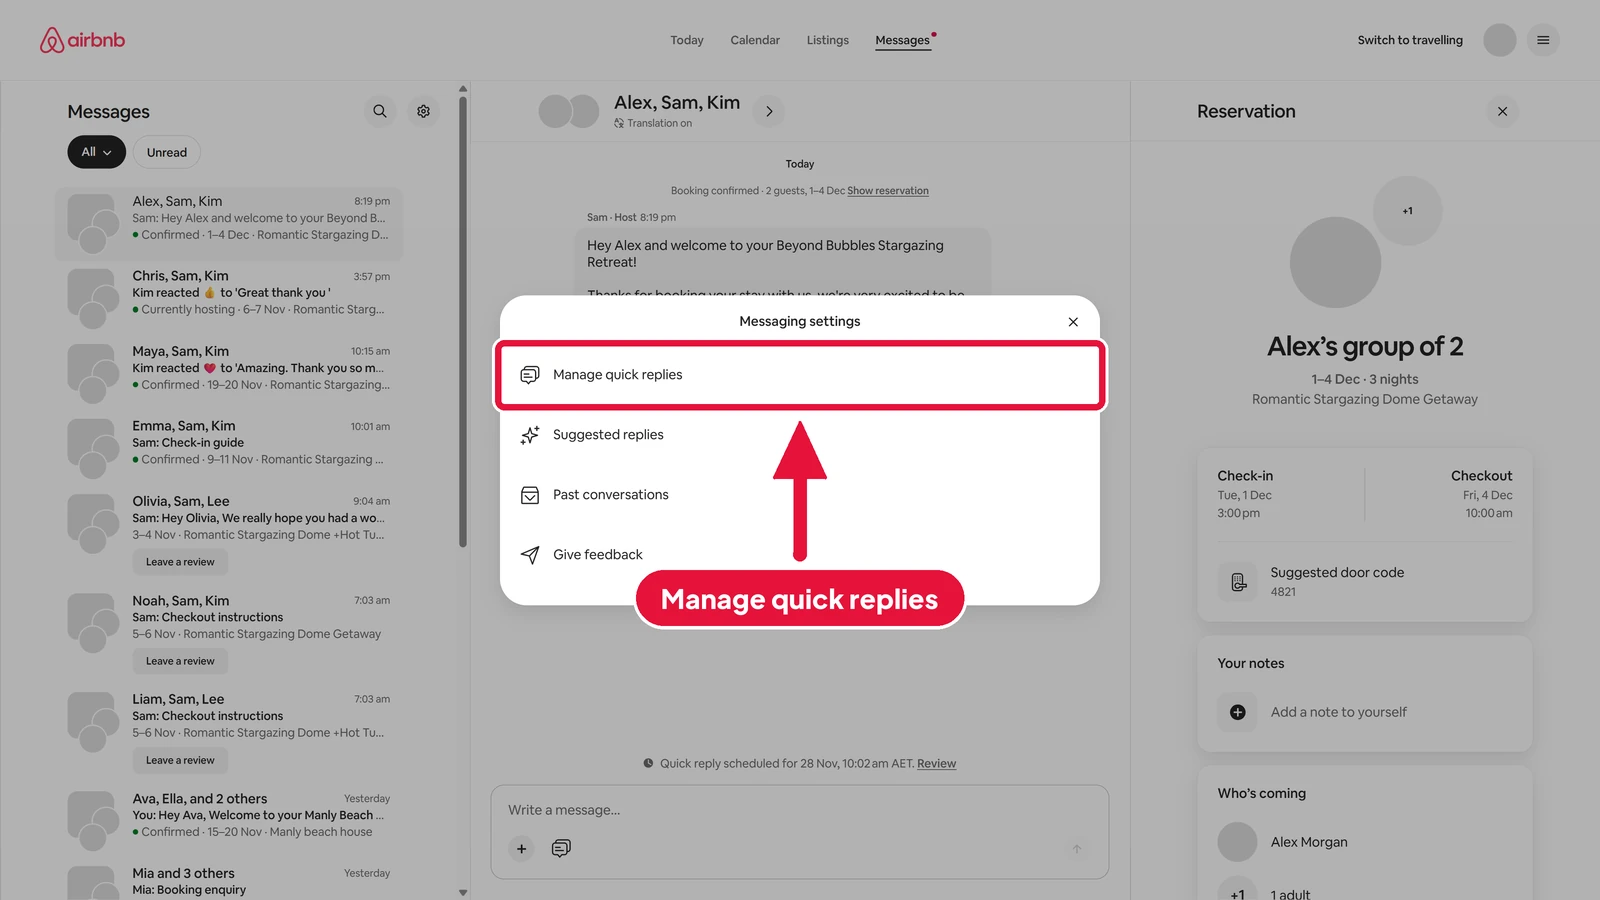
Click Manage quick replies. Quick replies are saved messages that Airbnb can send for you on a schedule.
-
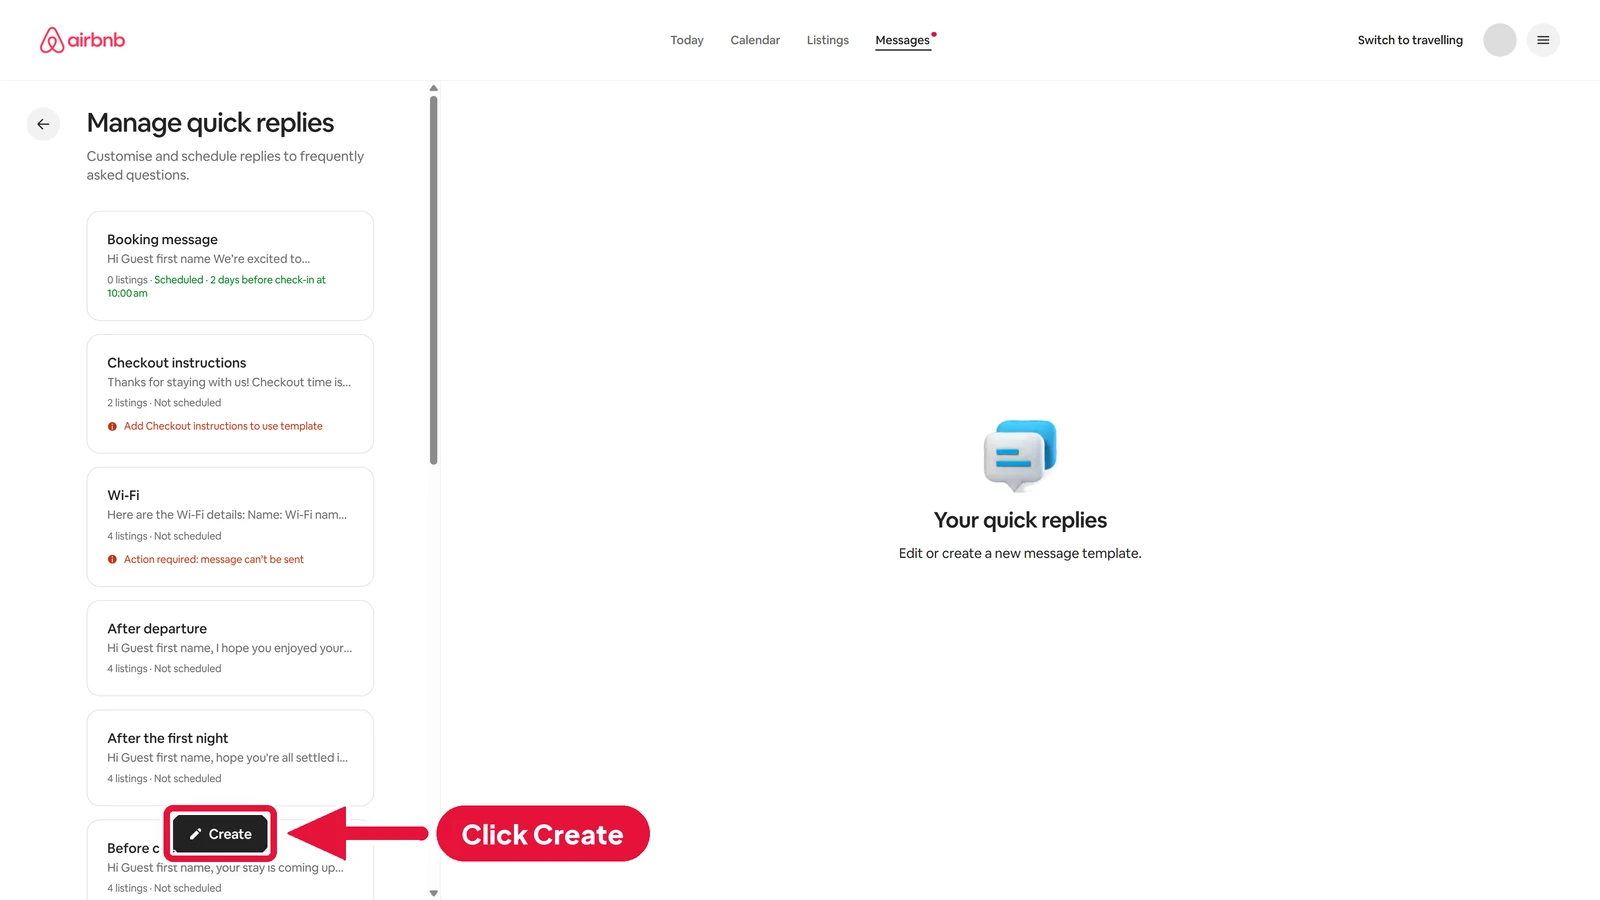
To write a brand new quick reply, click Create at the bottom left.
-
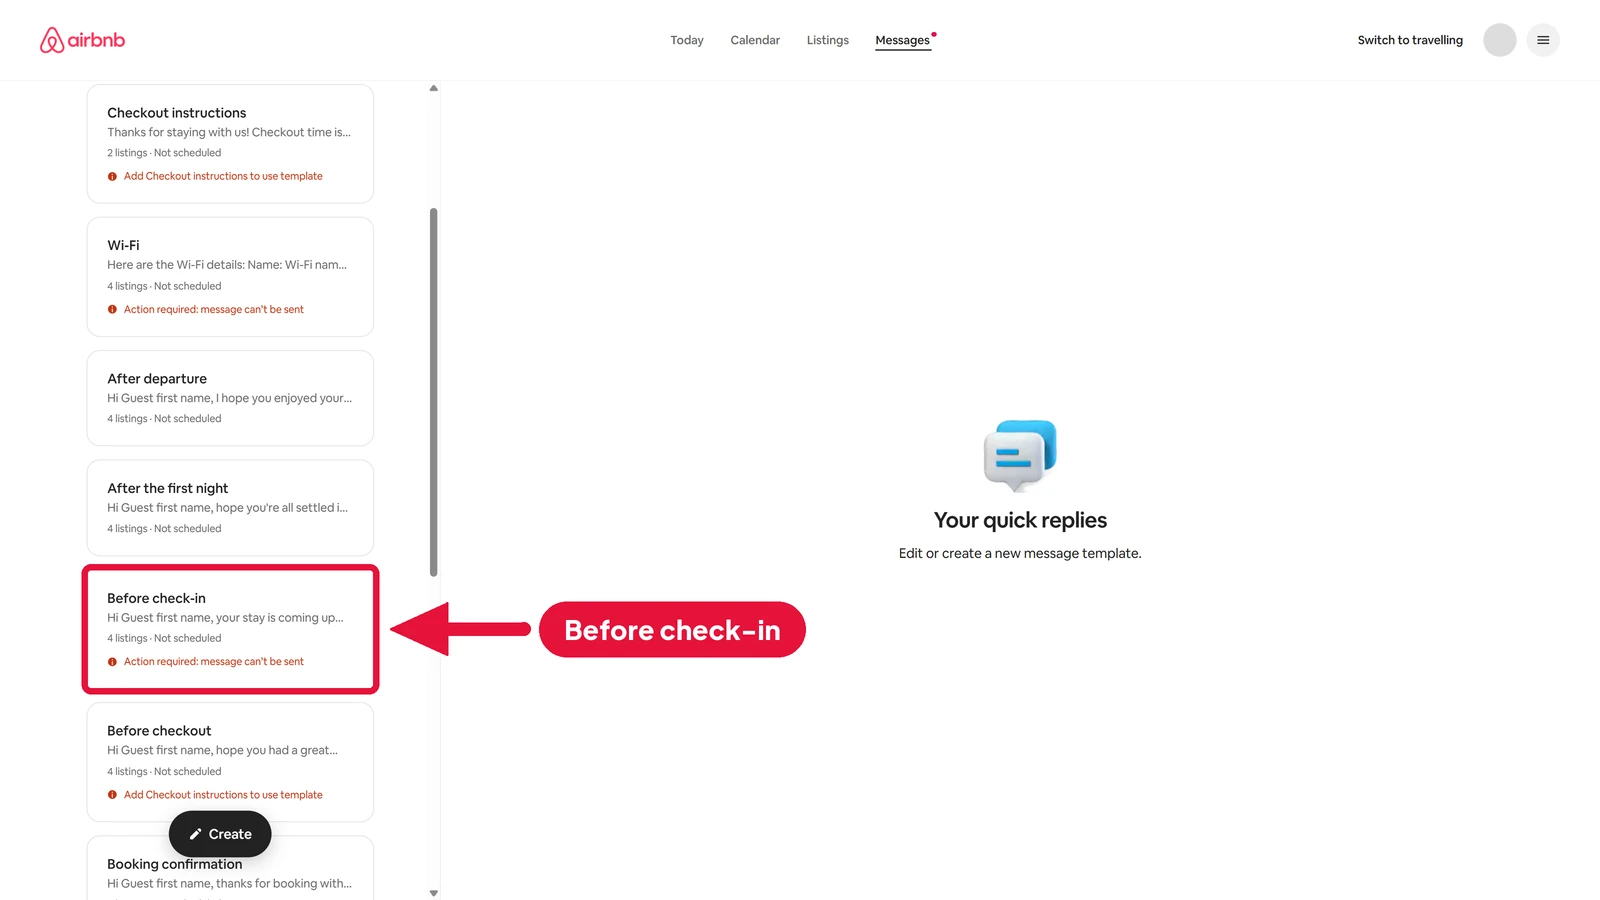
Or start from one of Airbnb's ready made quick replies. Scroll down the list and click Before check-in. A red note on a quick reply means a detail is missing, like your Wi-Fi name. You'll fix that in the next step.
Step 2: Write your message
#-
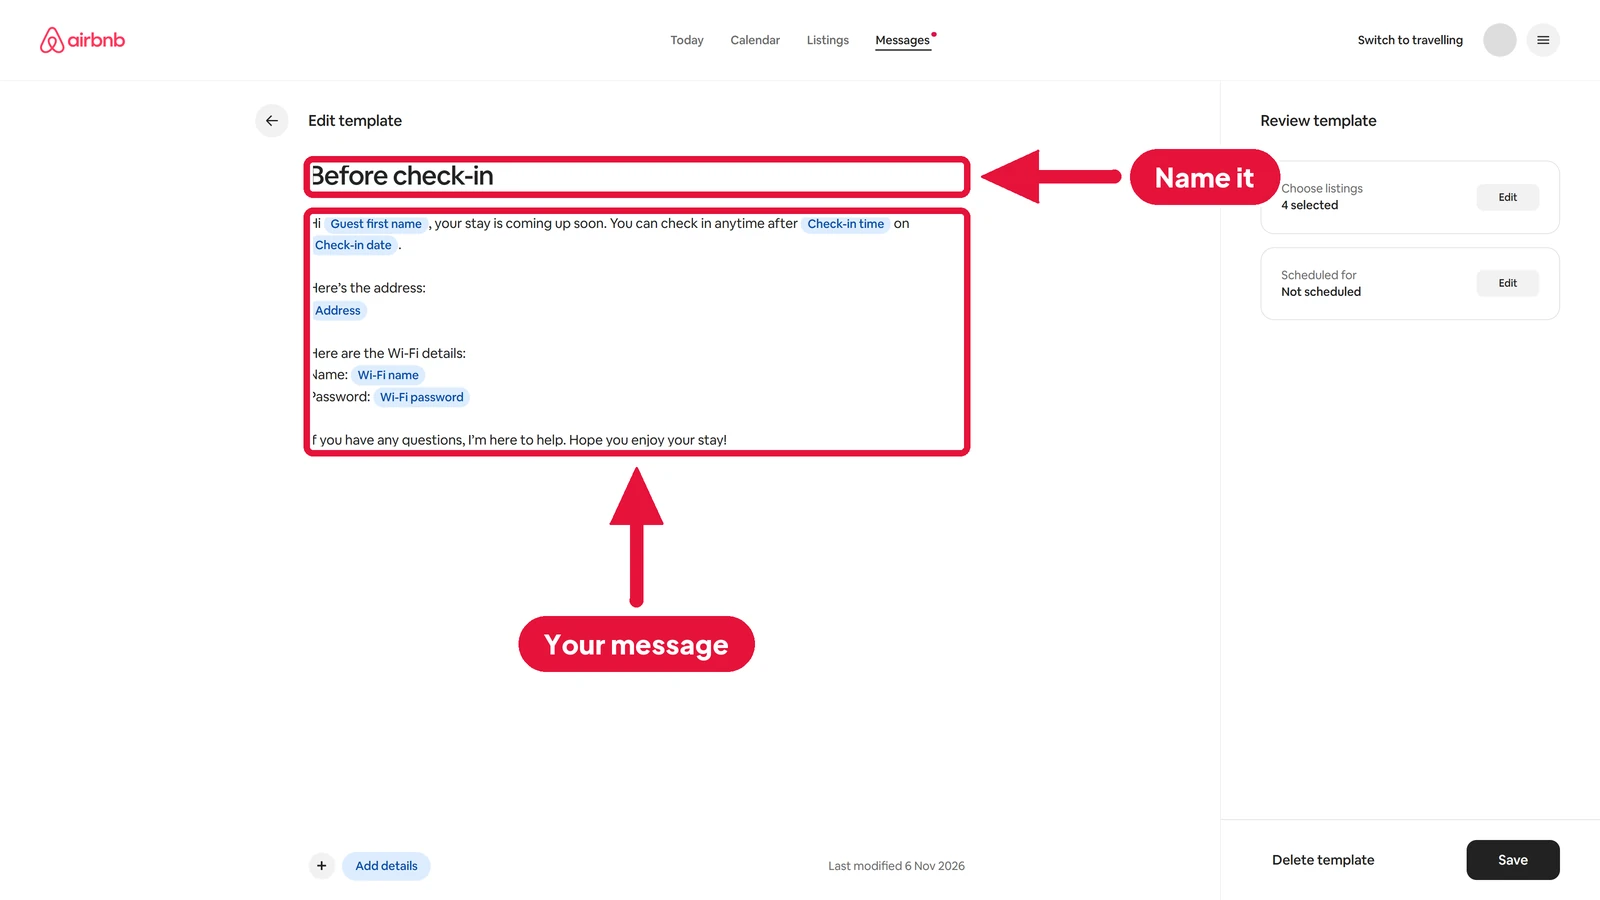
Give the quick reply a name at the top. Guests never see the name. It's just for you.
-
Write your message underneath. The blue fields fill themselves in for each guest. For example, Guest first name turns into "Alex".
-
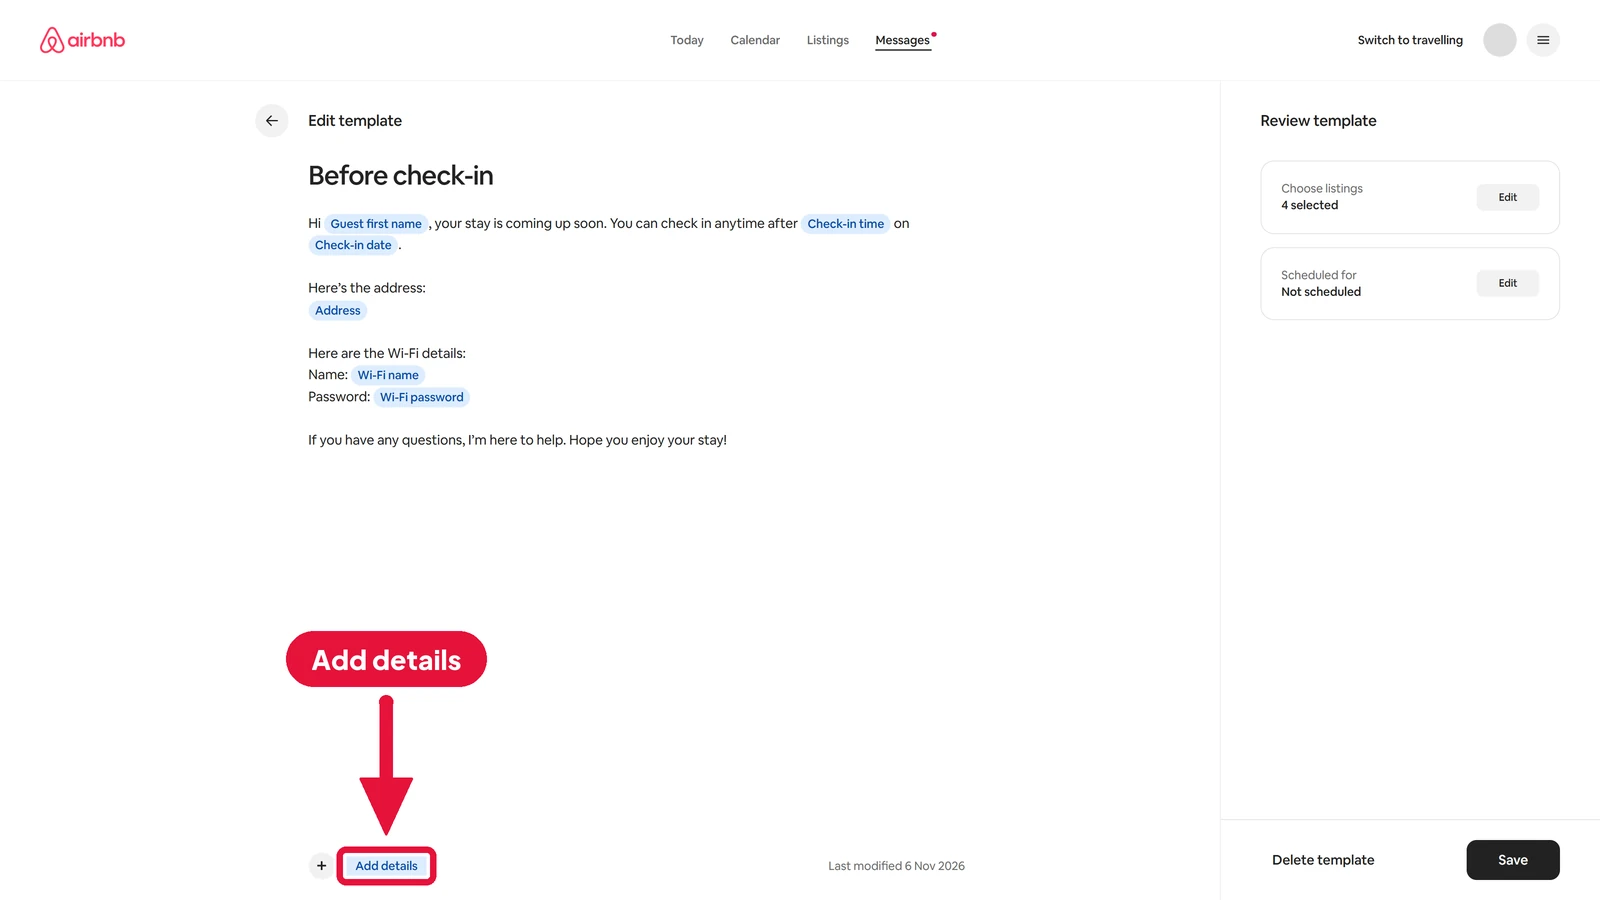
To add another blue field, click Add details at the bottom. The + button next to it adds a photo.
-
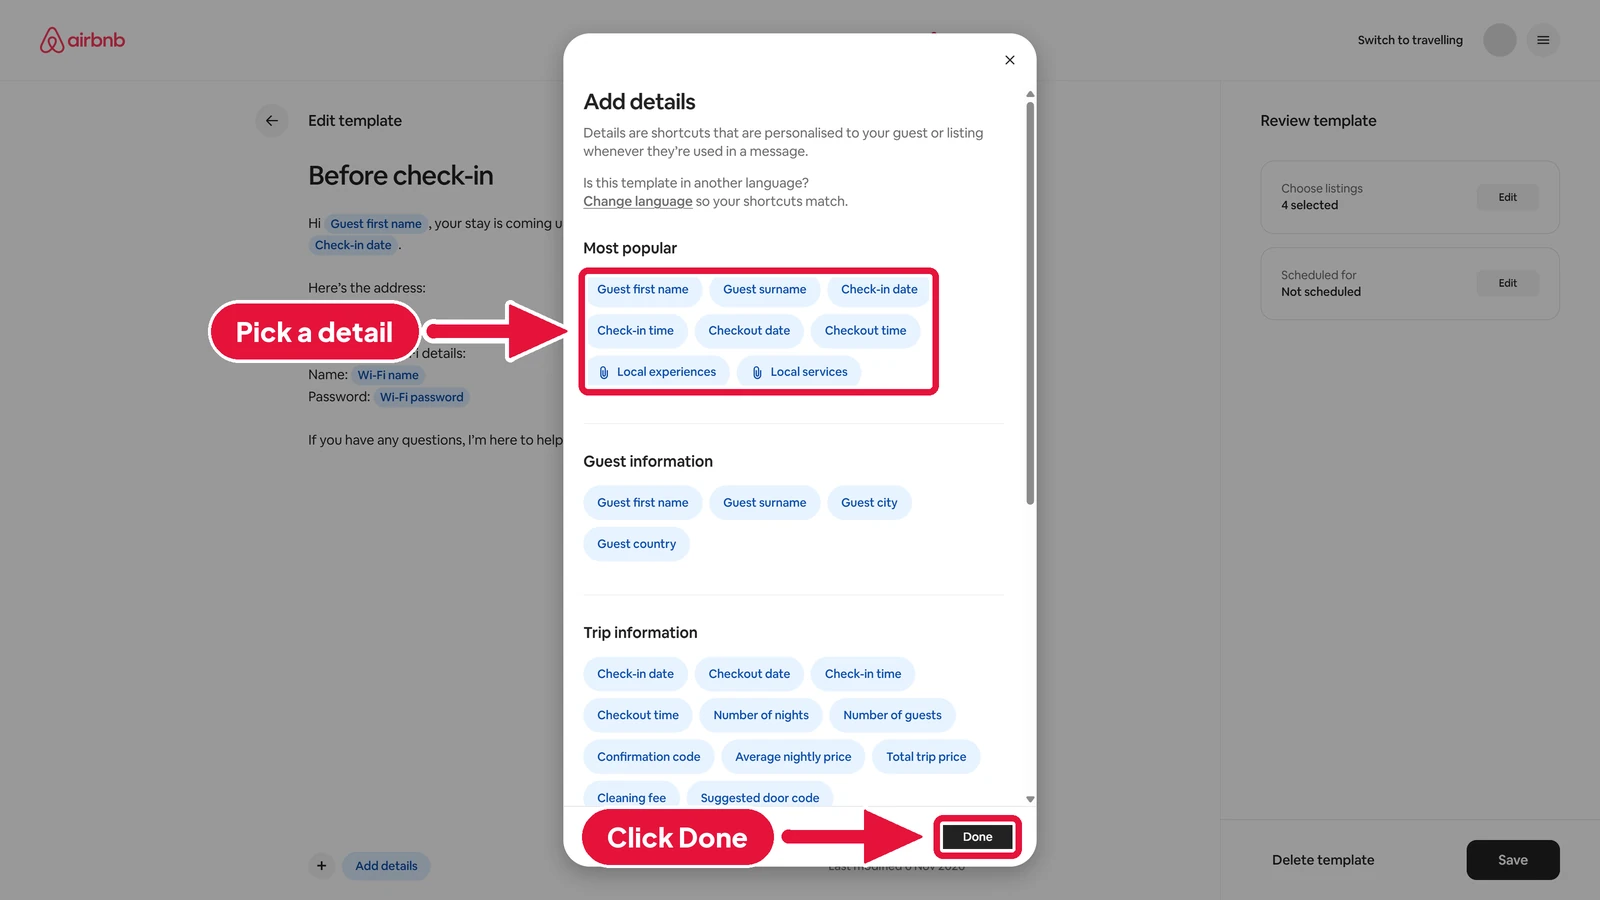
Pick the detail you want, like Check-in time, your address, or your Wi-Fi name. Then click Done.
Step 3: Choose your listings and when it sends
#-
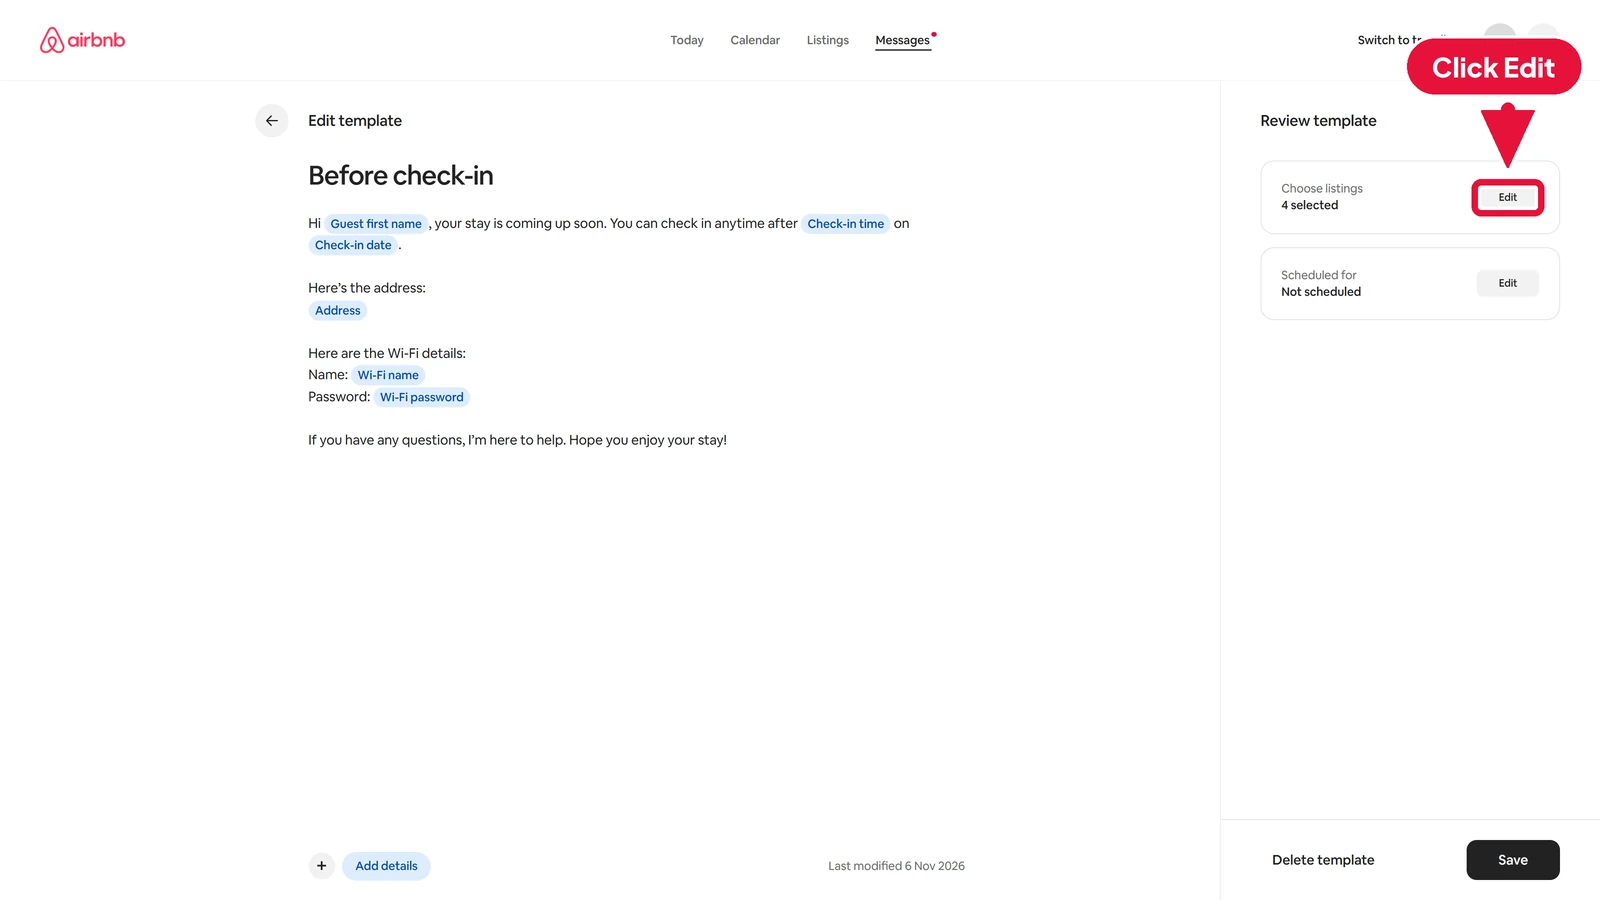
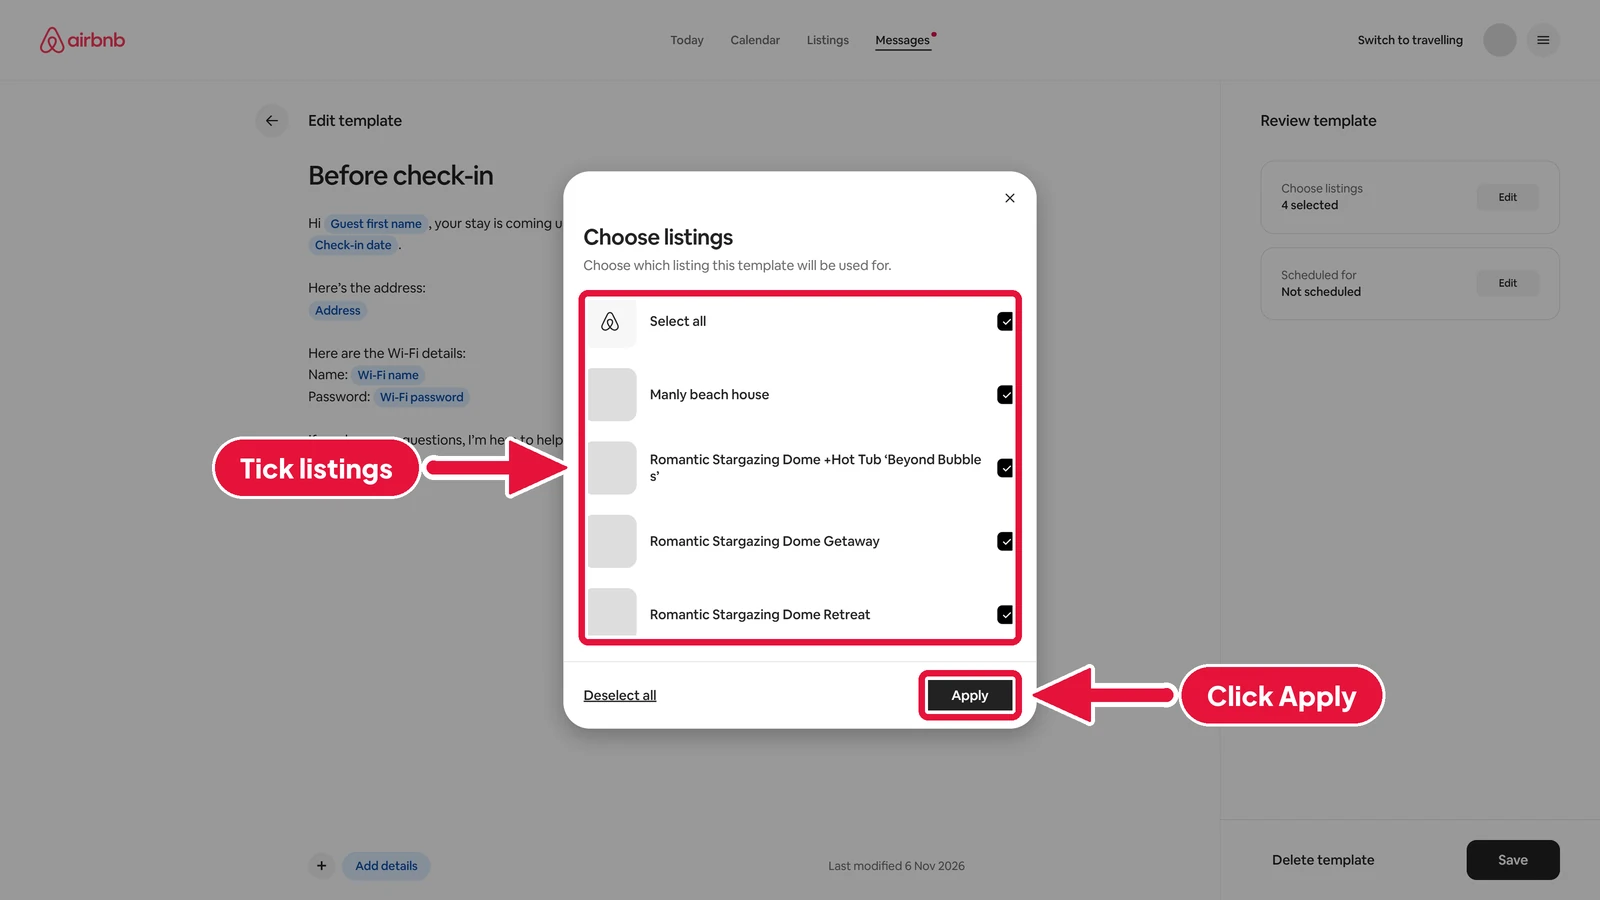
On the right, next to Choose listings, click Edit.
-
Tick each listing that should send this message. Then click Apply.
-
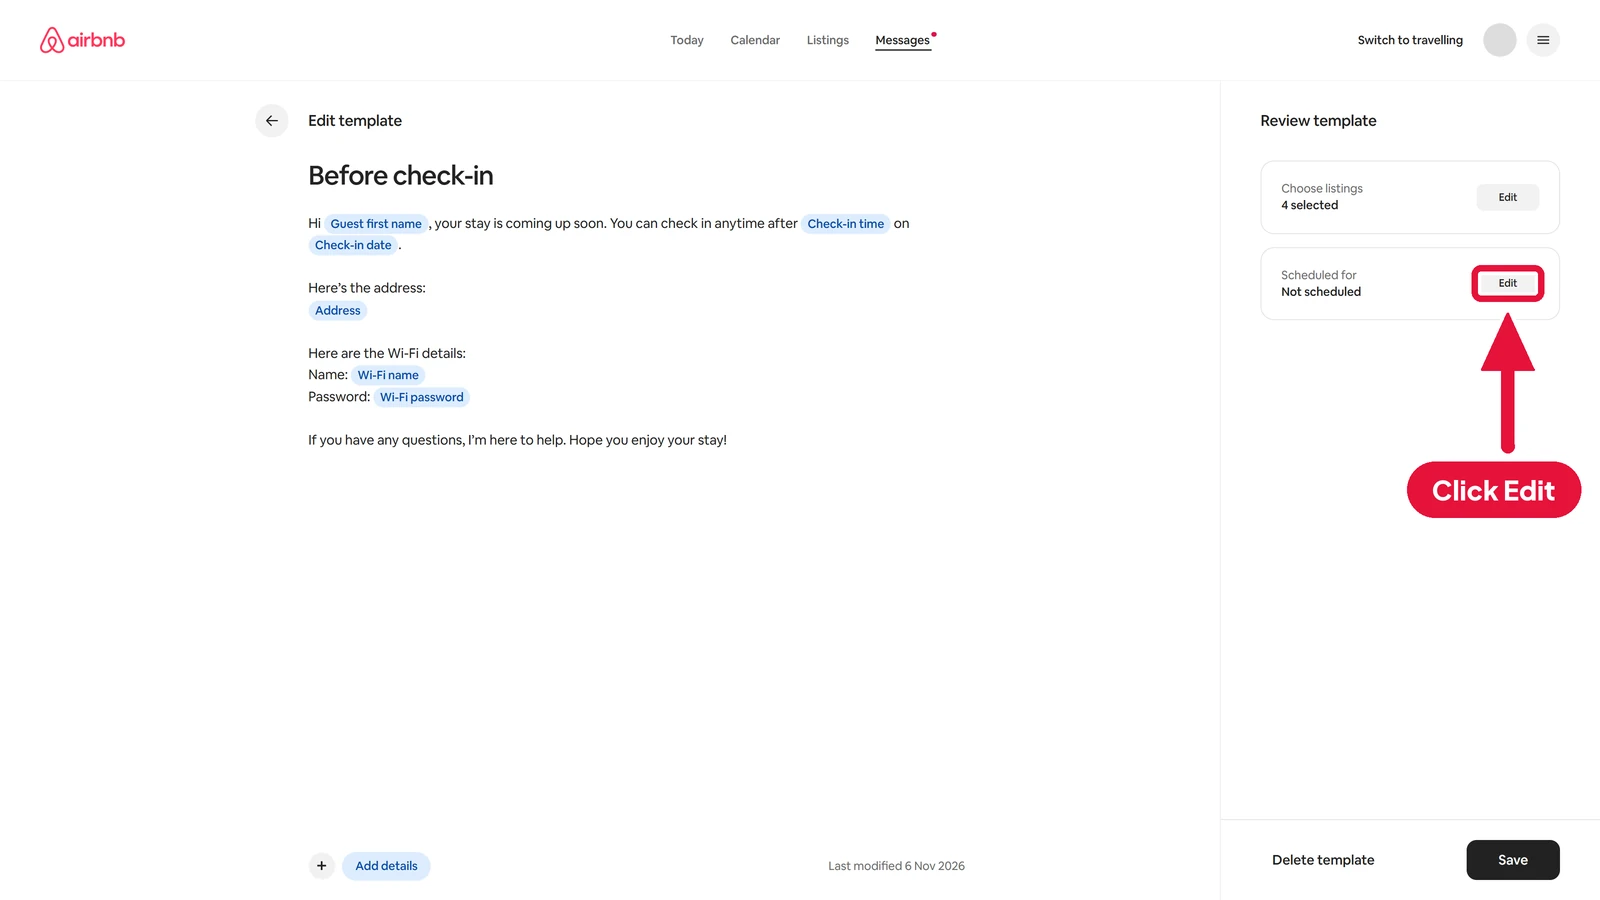
Next to Scheduled for, click Edit.
-
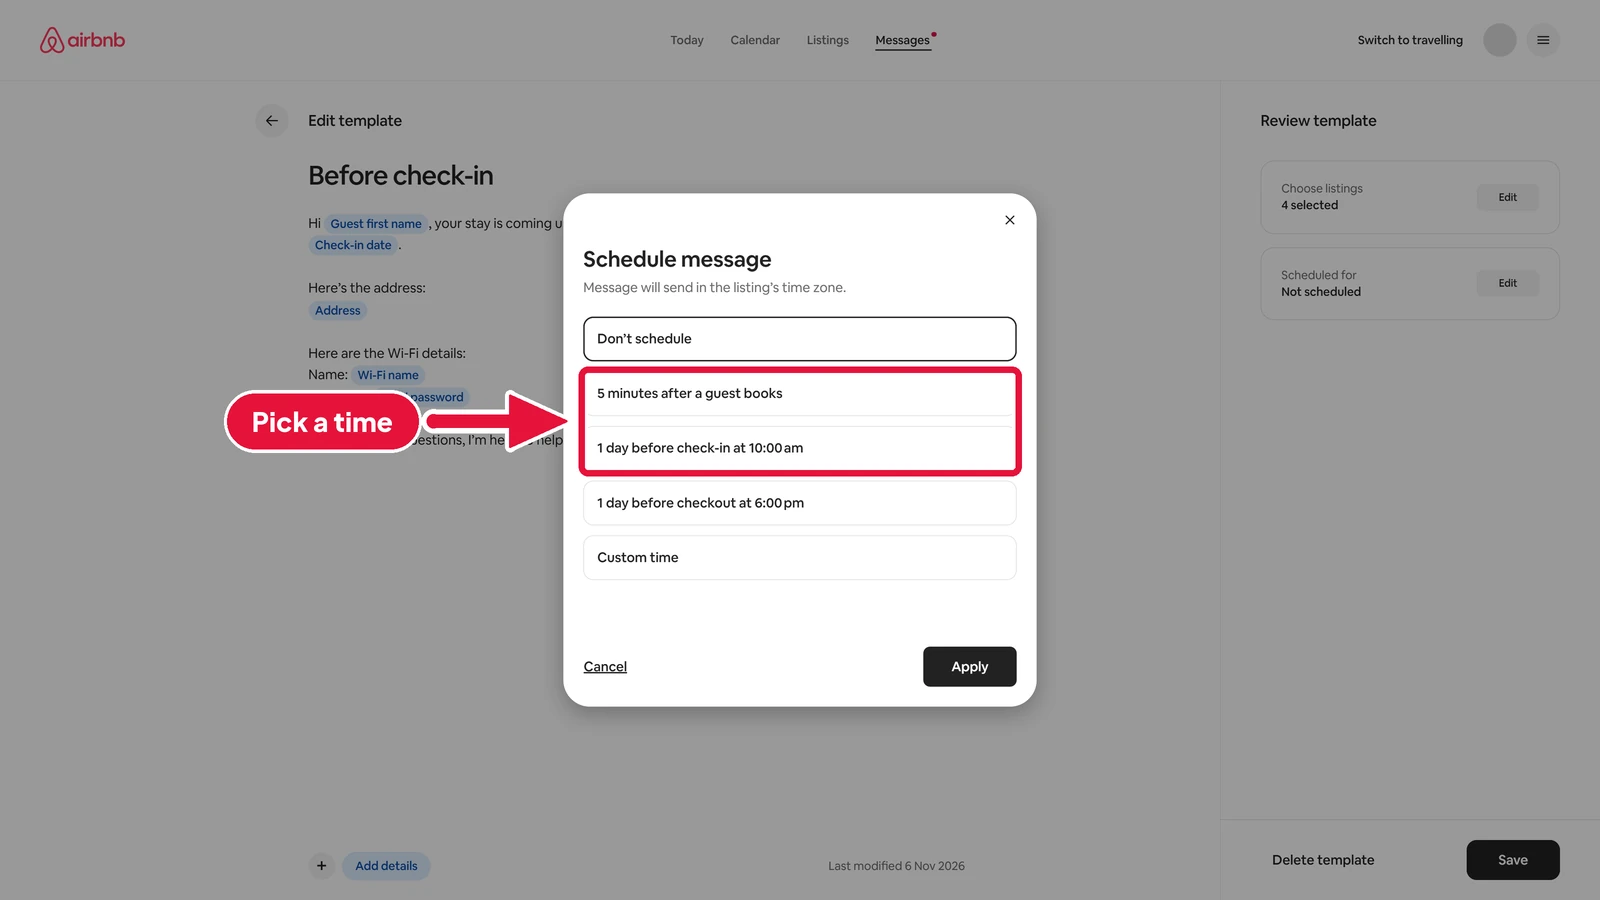
Pick a time from the quick choices. For example, 5 minutes after a guest books, or 1 day before check-in at 10:00am.
-
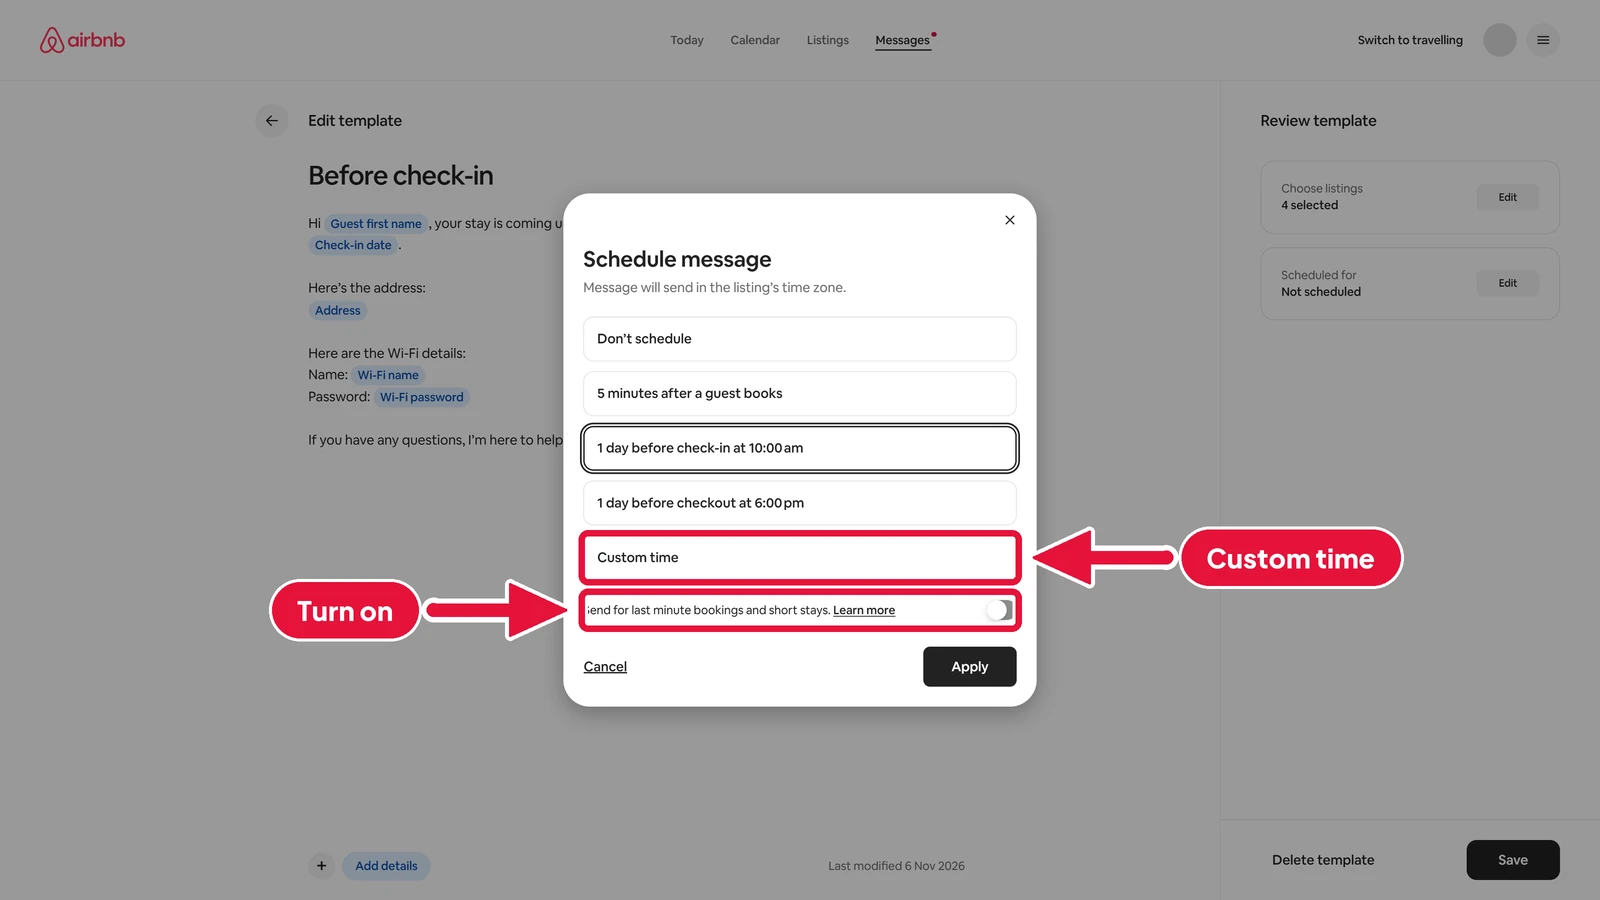
When you pick a check-in time, a switch appears for last minute bookings and short stays. Turn it on if you want those guests to get the message too. For a different time, click Custom time.
-
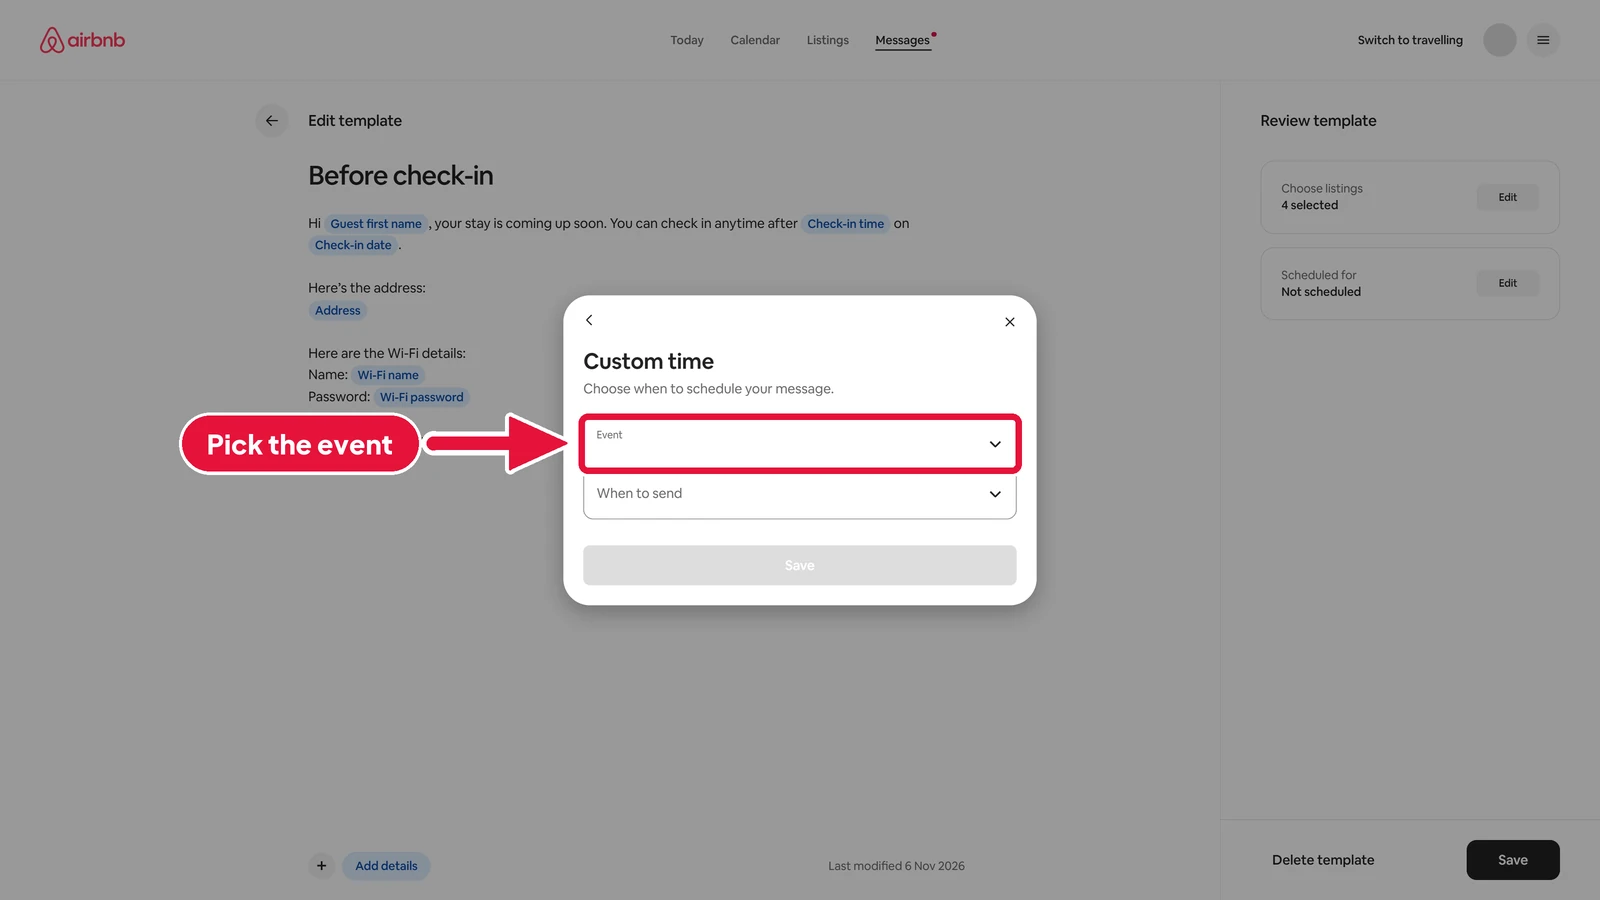
In Custom time, first pick the event: booking confirmed, check-in, or checkout.
-
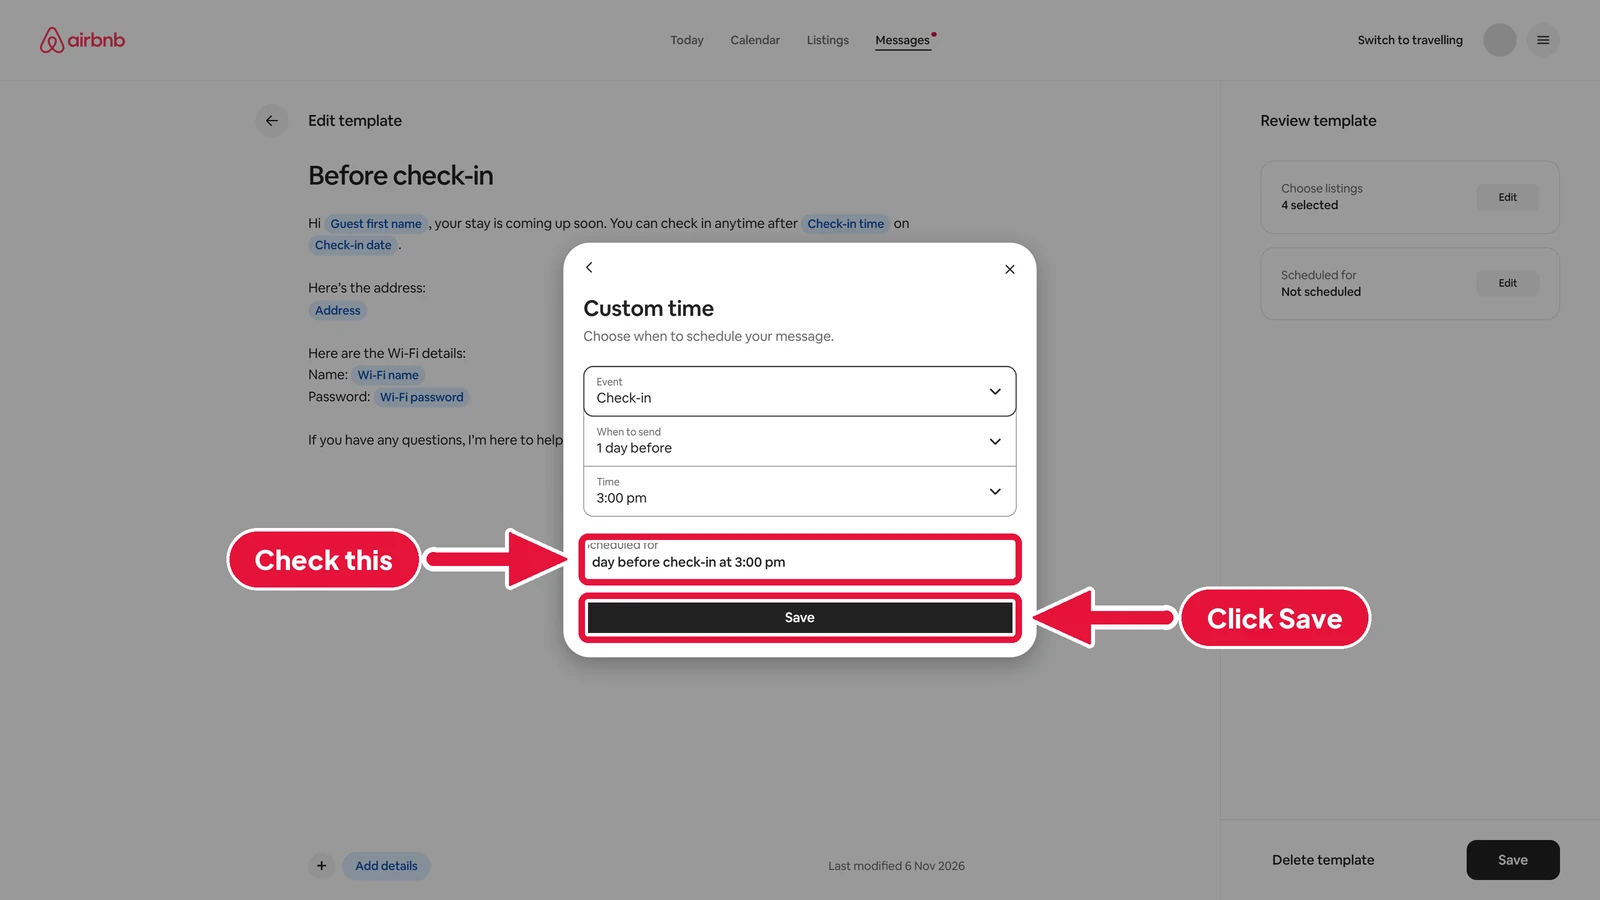
Then pick how many days before or after, and the time. Check the line under Scheduled for. Here it says "1 day before check-in at 3:00 pm". Click Save.
-
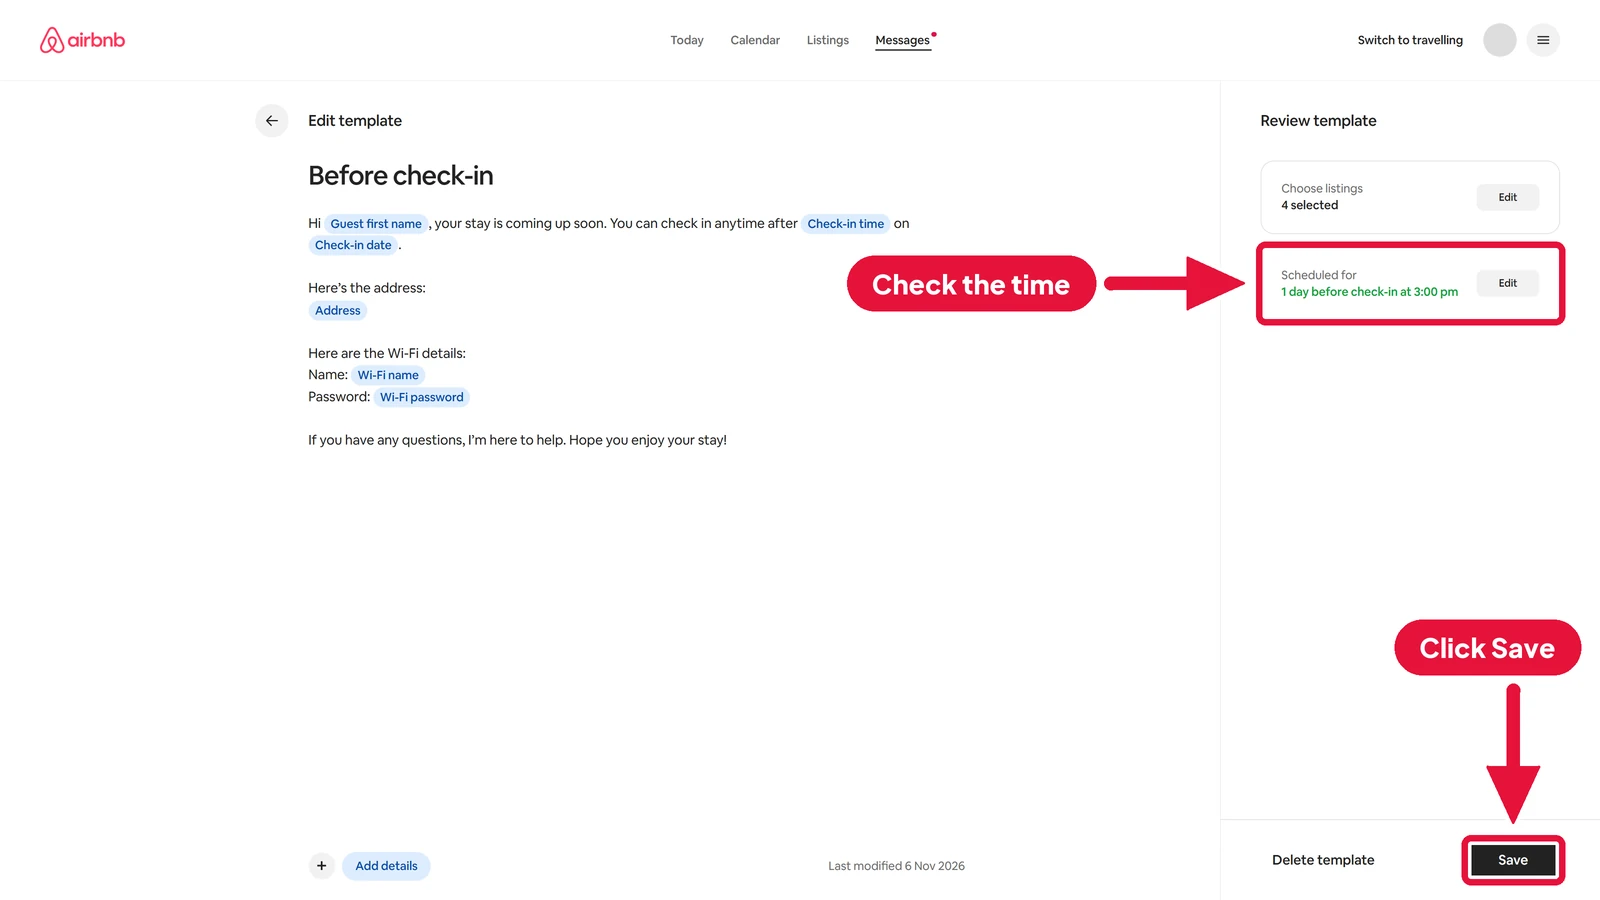
Check that Scheduled for on the right shows the right time. Then click Save at the bottom right. Your quick reply is now live.
Step 4: Check what's scheduled for a guest
#-
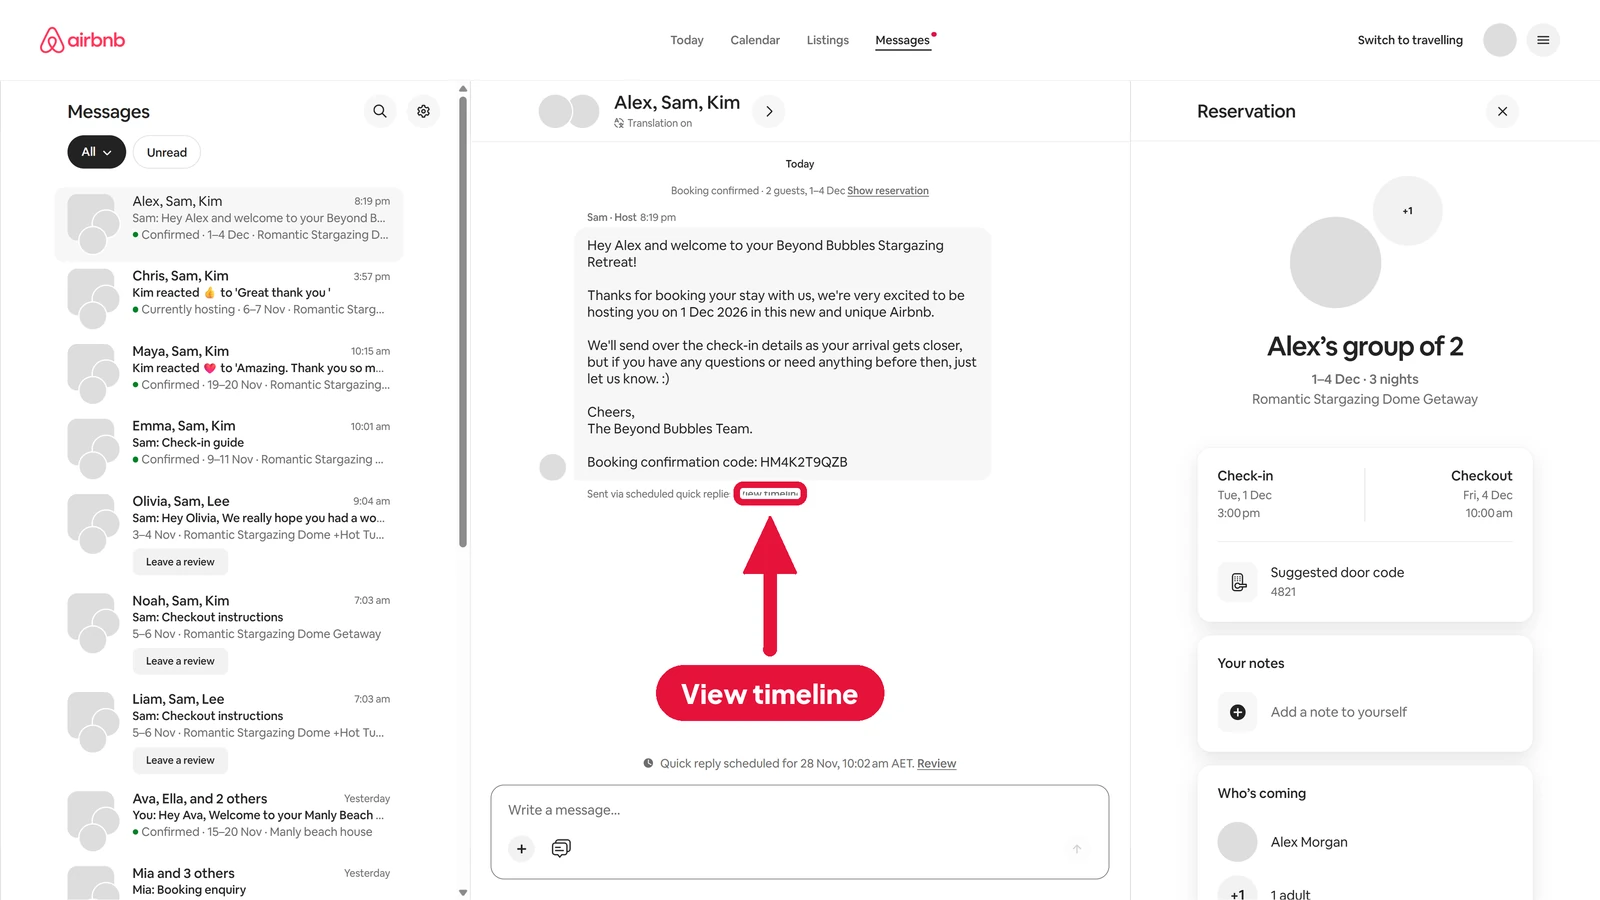
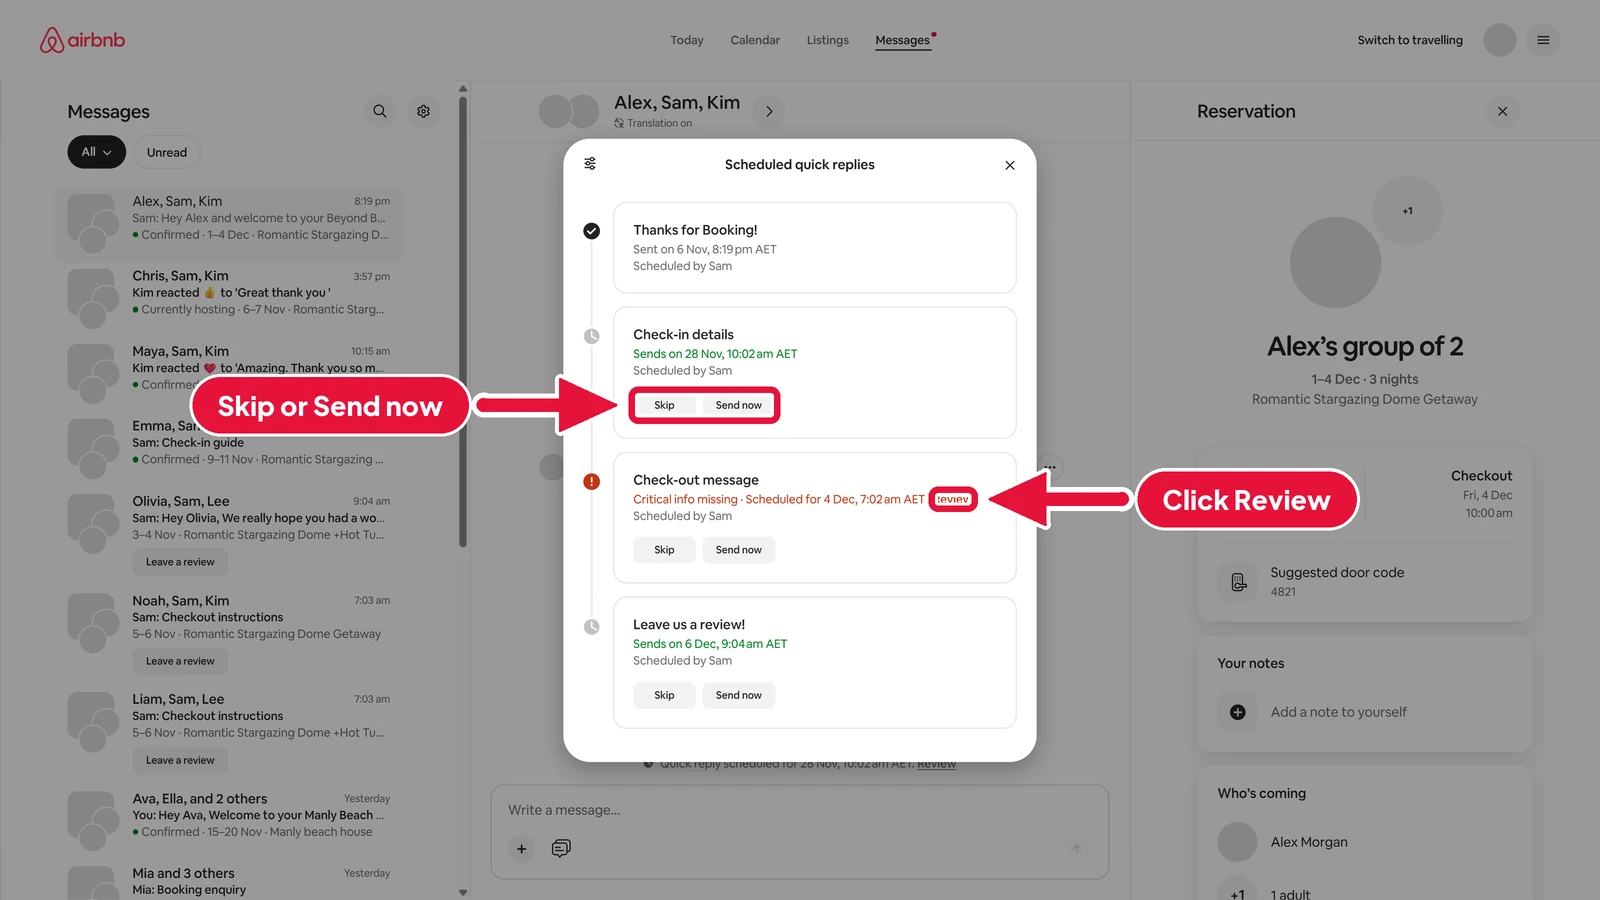
Open a guest's chat in Messages. Under the last message, click View timeline.
-
You'll see every message that guest will get, in order. You can Skip a message or Send now. If a message says Critical info missing, click Review to add the missing detail. Otherwise that message won't send.
The catch: Airbnb only messages Airbnb guests
#Airbnb's quick replies only go to guests who booked on Airbnb. If you also take bookings on Booking.com, Vrbo or your own website, those guests get nothing. You'd have to set up the same messages again on every site.
With Host Port, you set your messages up once. They go to every guest, wherever they booked. Here's how.
Step 5: Open your listing in Host Port
#-
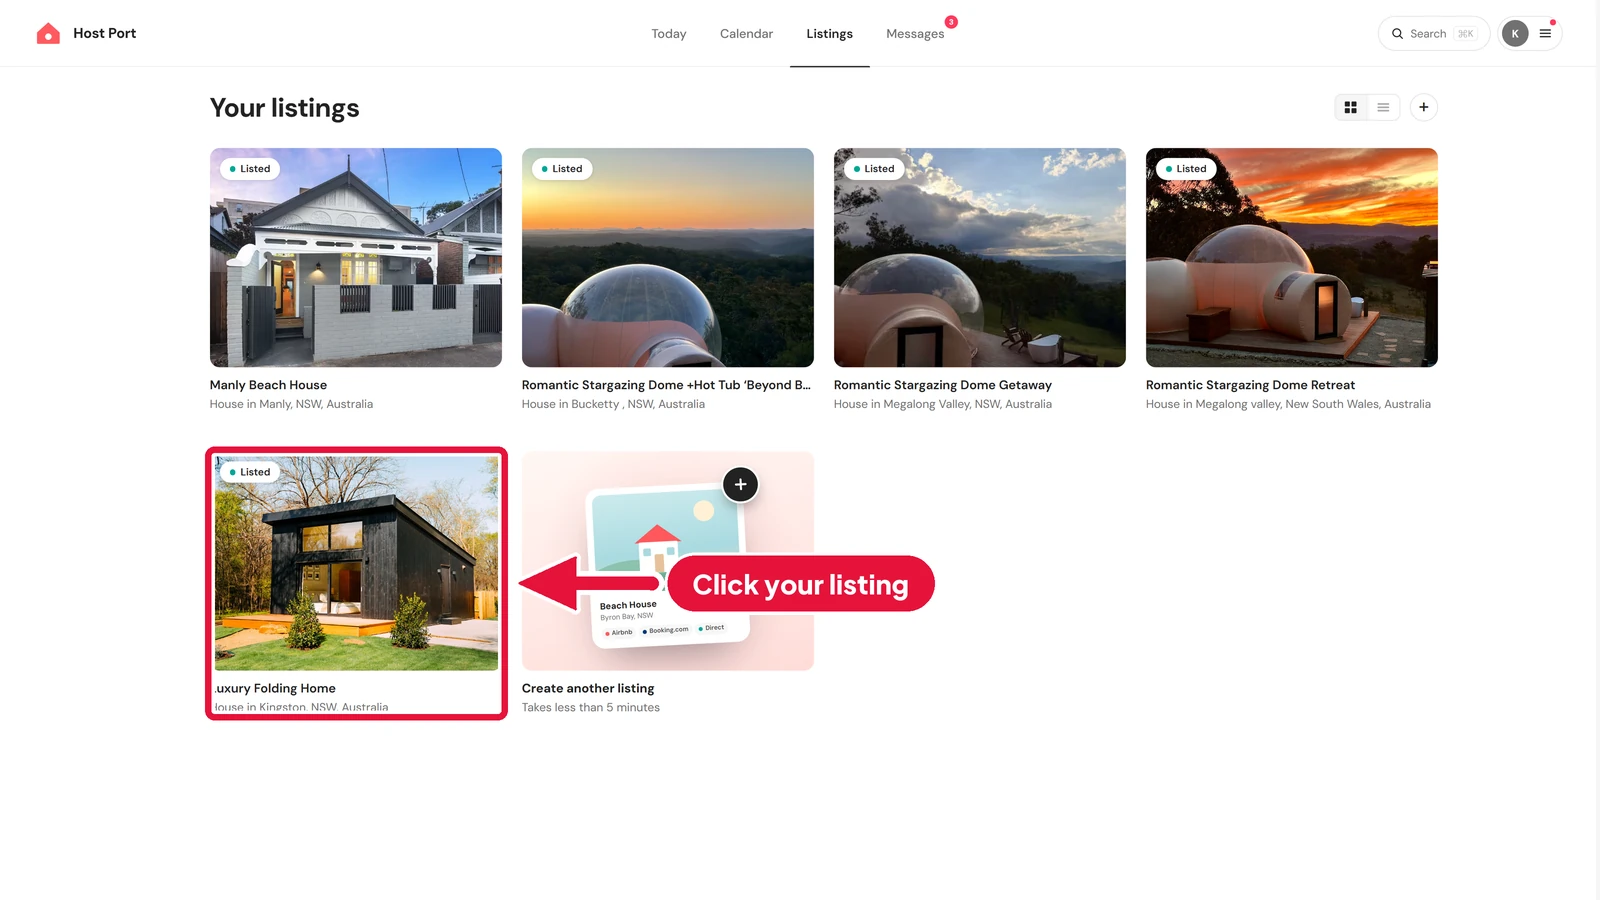
In Host Port, go to Listings and click your listing.
-
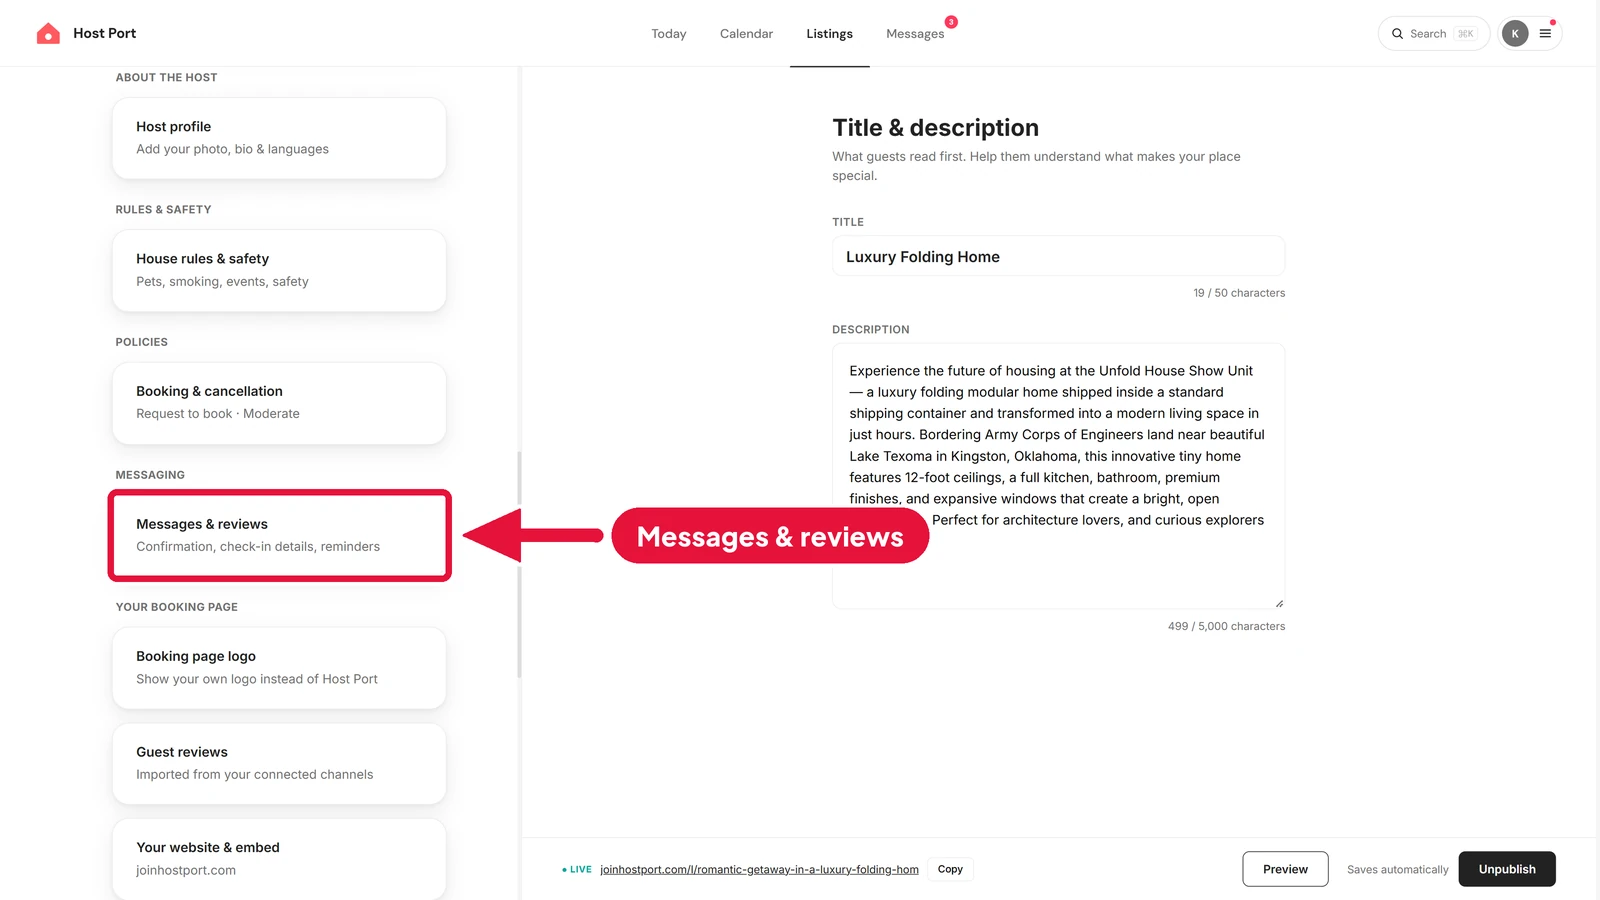
On the left, scroll down to Messaging and click Messages & reviews.
Step 6: Choose your channels
#-
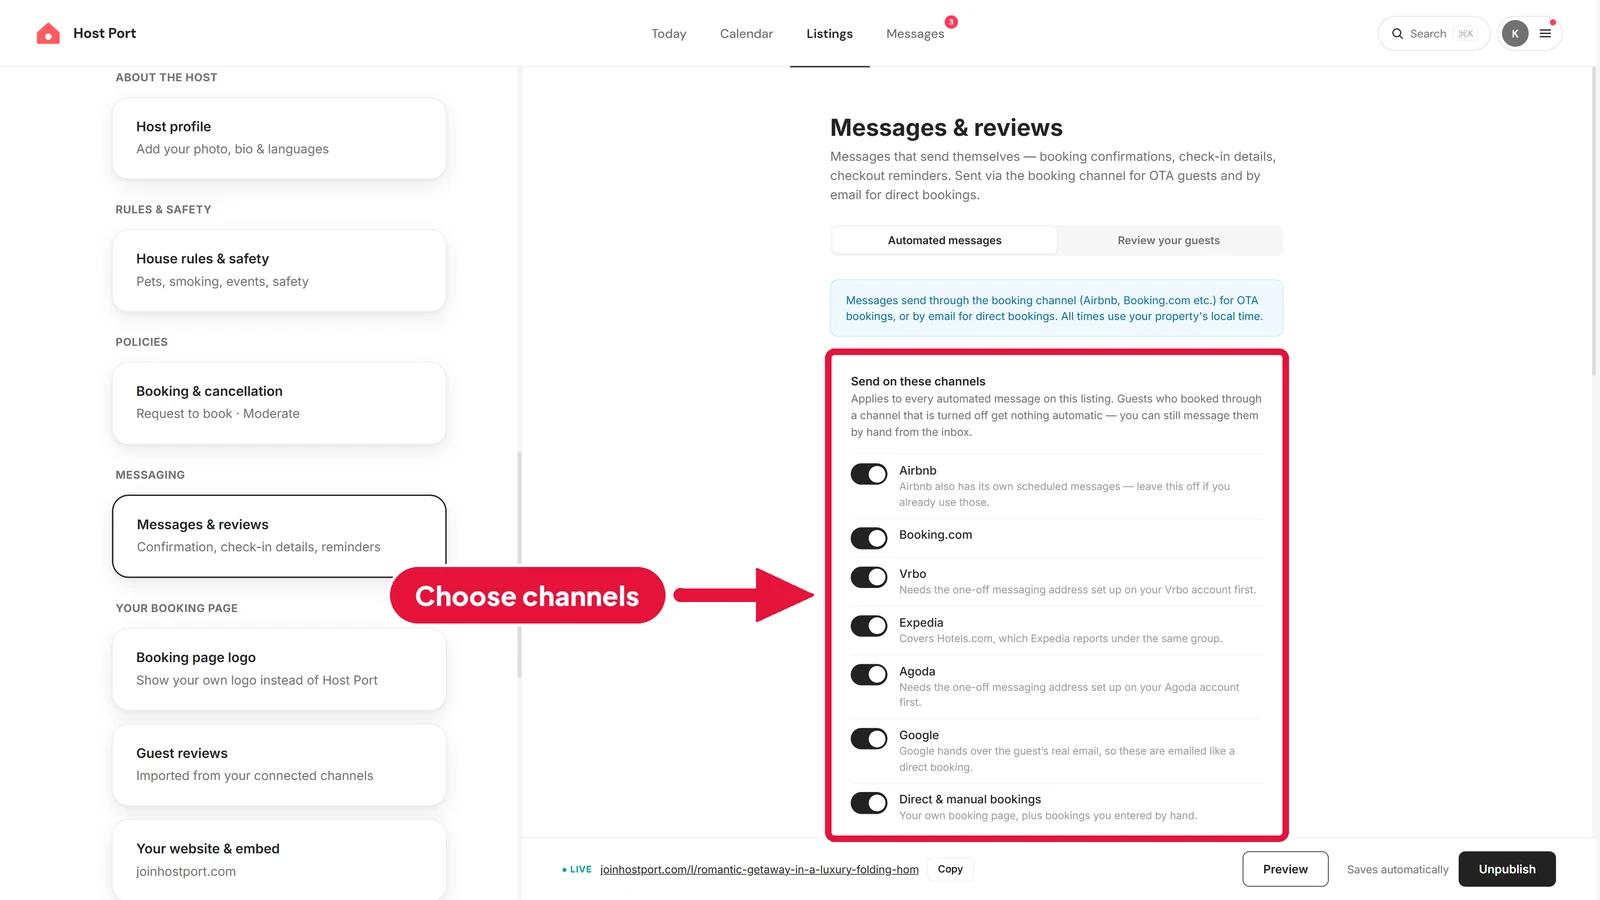
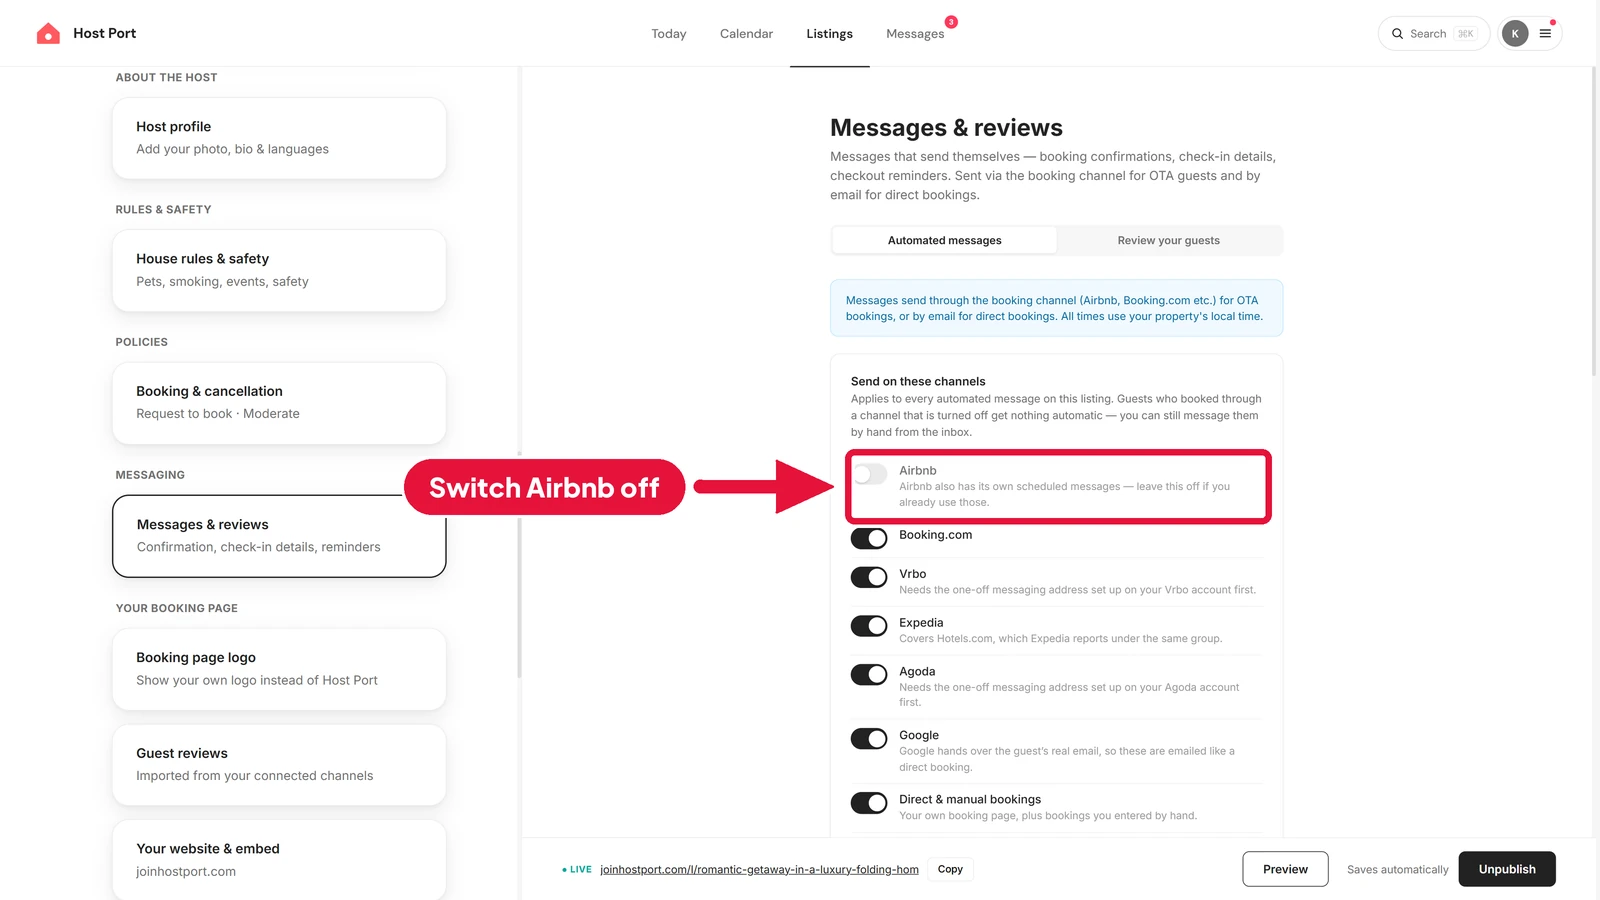
Host Port sends each message through the site the guest booked on. Direct bookings get an email. Under Send on these channels, choose which sites should send messages. Vrbo and Agoda need a one-off messaging address set up on their side first.
-
If you keep your Airbnb quick replies, switch Airbnb off here. That way guests don't get the same message twice.
Step 7: Add a message
#-
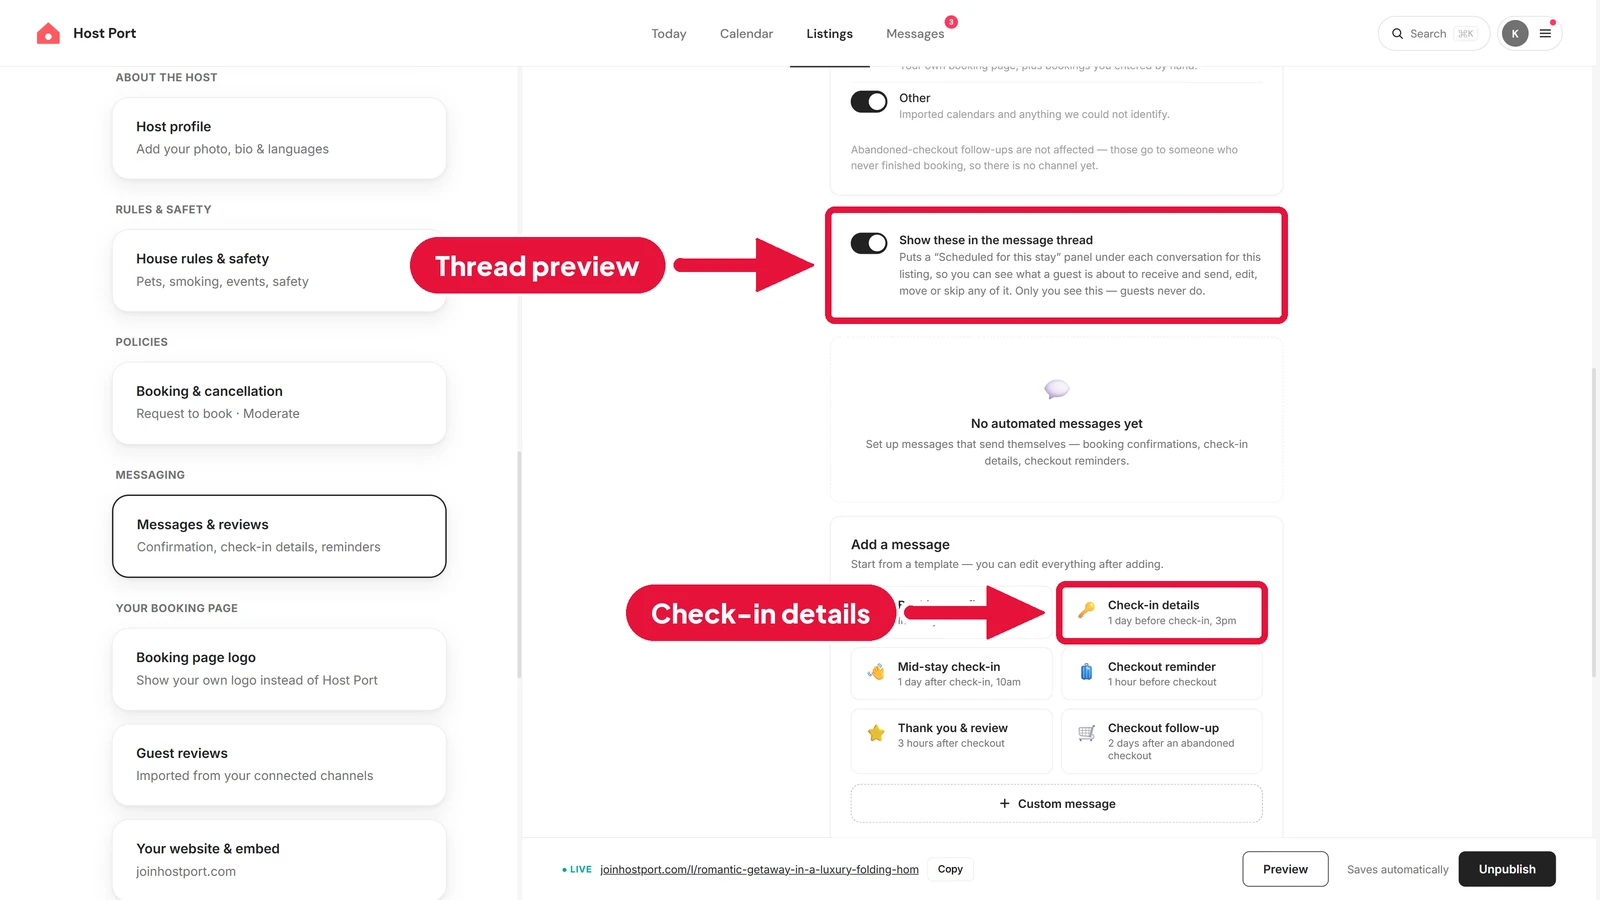
Scroll down. The Show these in the message thread switch shows you what each guest is about to get, right in their chat. Only you see this. Guests never do.
-
Under Add a message, choose a ready made message or Custom message. Here we'll pick Check-in details.
-
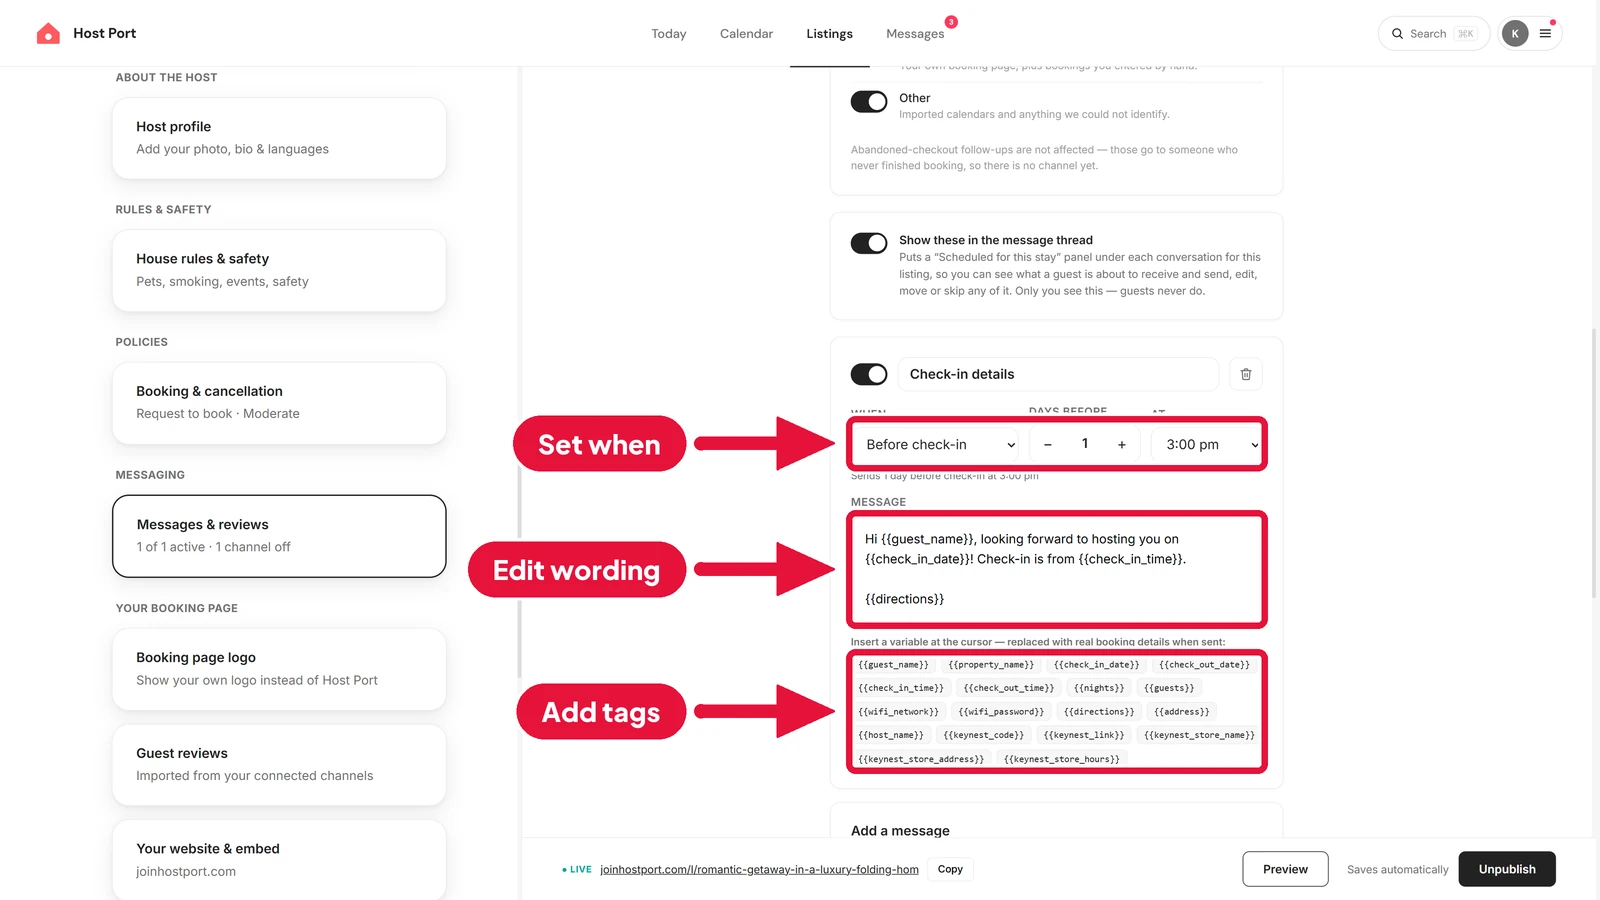
Set When (for example, before check-in). Use - and + to set the number of days, and pick the time on the right.
-
Change the wording to suit you. Click a tag under the message, like guest_name, to add a booking detail.
-
The switch next to the message name turns that message on or off. Host Port saves as you go, so there's no save button to press.
That's it. Every guest now gets your check-in details at the right time, whether they booked on Airbnb, Booking.com, Vrbo or your own website.
Flat pricing, no contract, no sales call.
Host Port syncs your calendars with Airbnb, Booking.com and Vrbo and gives every listing a direct booking page. That part is free: unlimited listings, no card, no time limit. Two-way channel sync is $10 USD per listing per month, and it puts guest messages from your connected channels in one inbox.