On this page8 sections
To add a co-host on Airbnb, open your listing, click the Co-hosts card, and click Add a co-host. Choose Invite someone you know, type their email, and pick what they are allowed to do, like Calendar and messaging access. Then check the summary and click Send. Your co-host has two weeks to accept. Adding a co-host only takes a few clicks.
TL;DR
#- On Airbnb, you add a co-host from the Co-hosts card in your listing editor. Click Add a co-host to start.
- You choose what your co-host can do: Full access, Calendar and messaging access, or Calendar access. You can change this later.
- Airbnb sends the invite to your co-host's email. They have two weeks to accept, and show as Invite sent until they do.
- Airbnb only covers its own listings. Host Port adds your co-host to every site once (Steps 5 and 6).
Prefer to watch? Here's the whole guide as a video.
Step 1: Open your co-hosts
#-
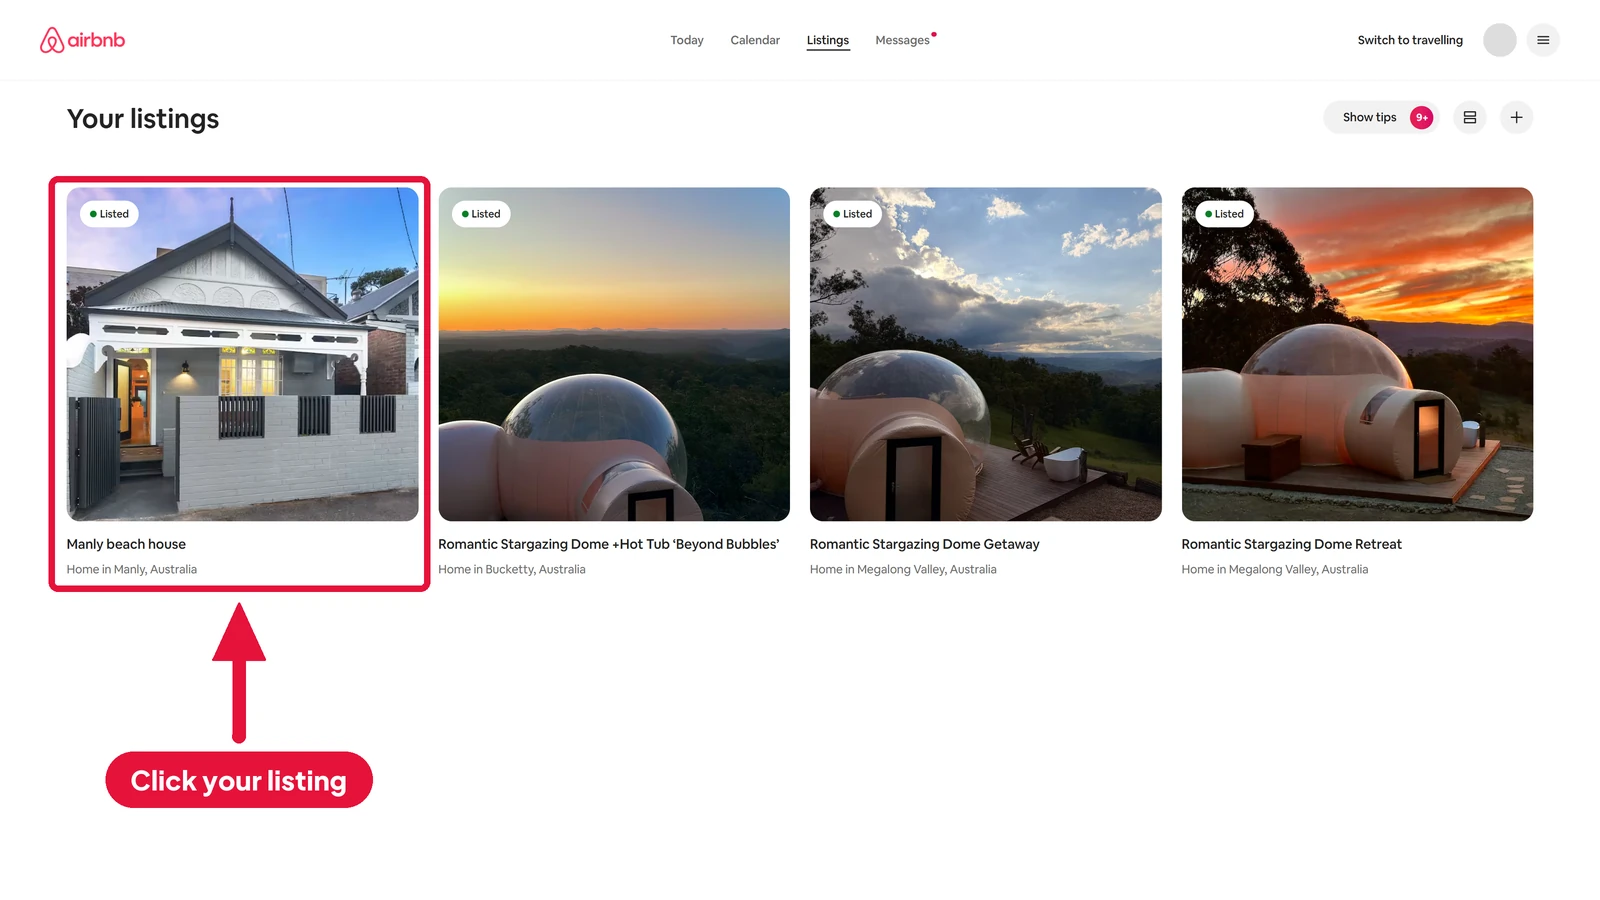
On your Airbnb Listings page, click the listing you'd like some help with.
-
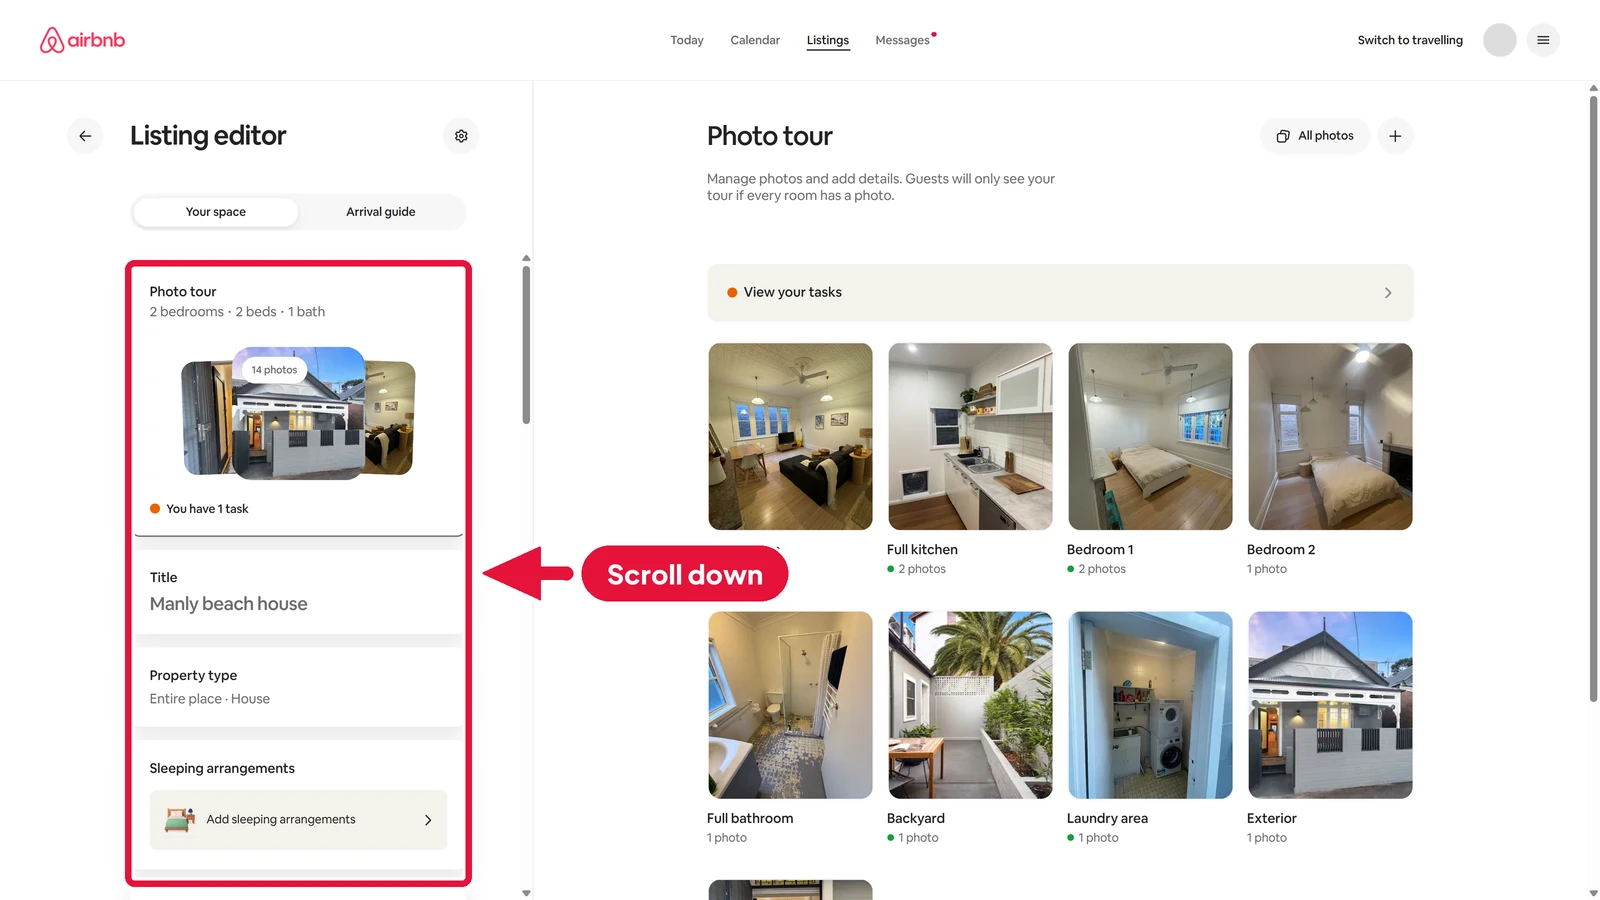
The listing editor opens. On the left, scroll down.
-
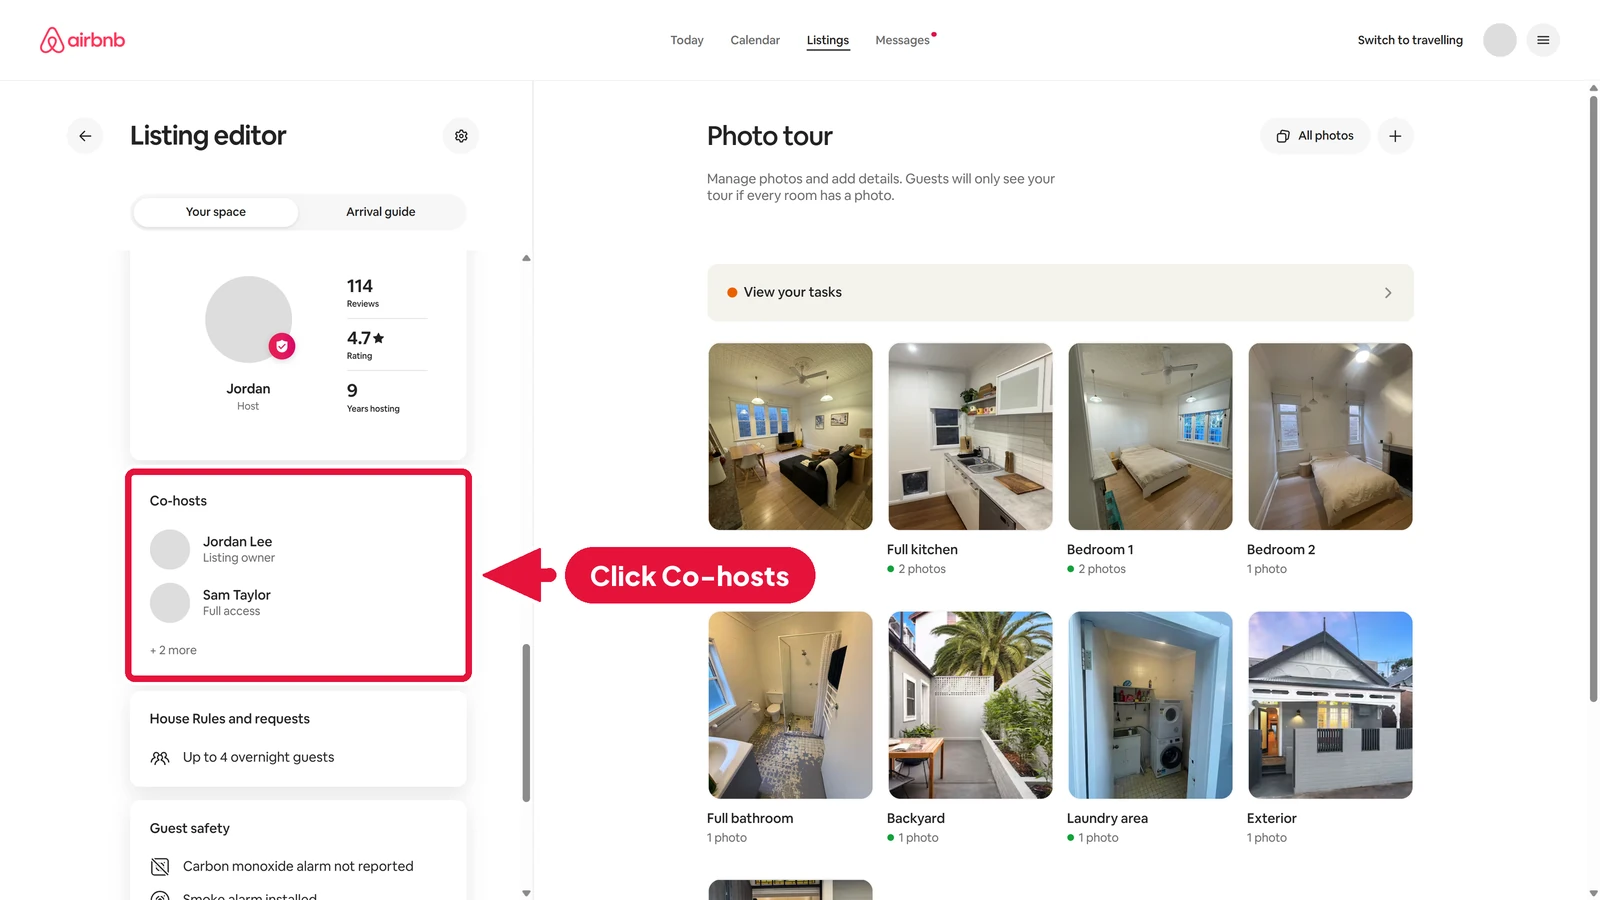
Click the Co-hosts card to see who helps with this listing.
-
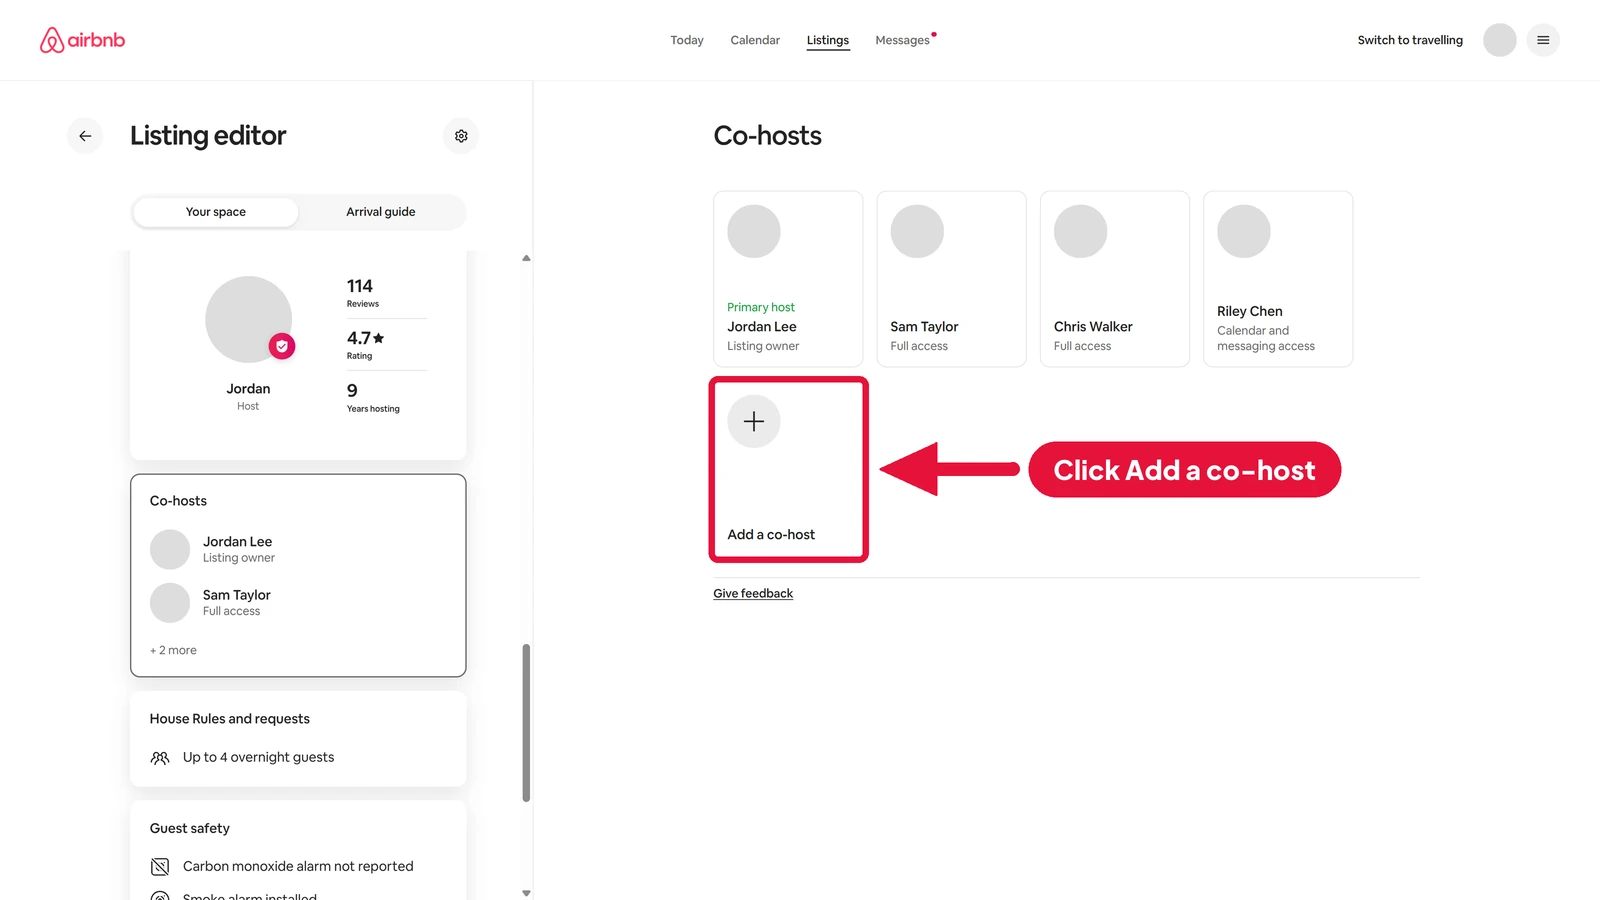
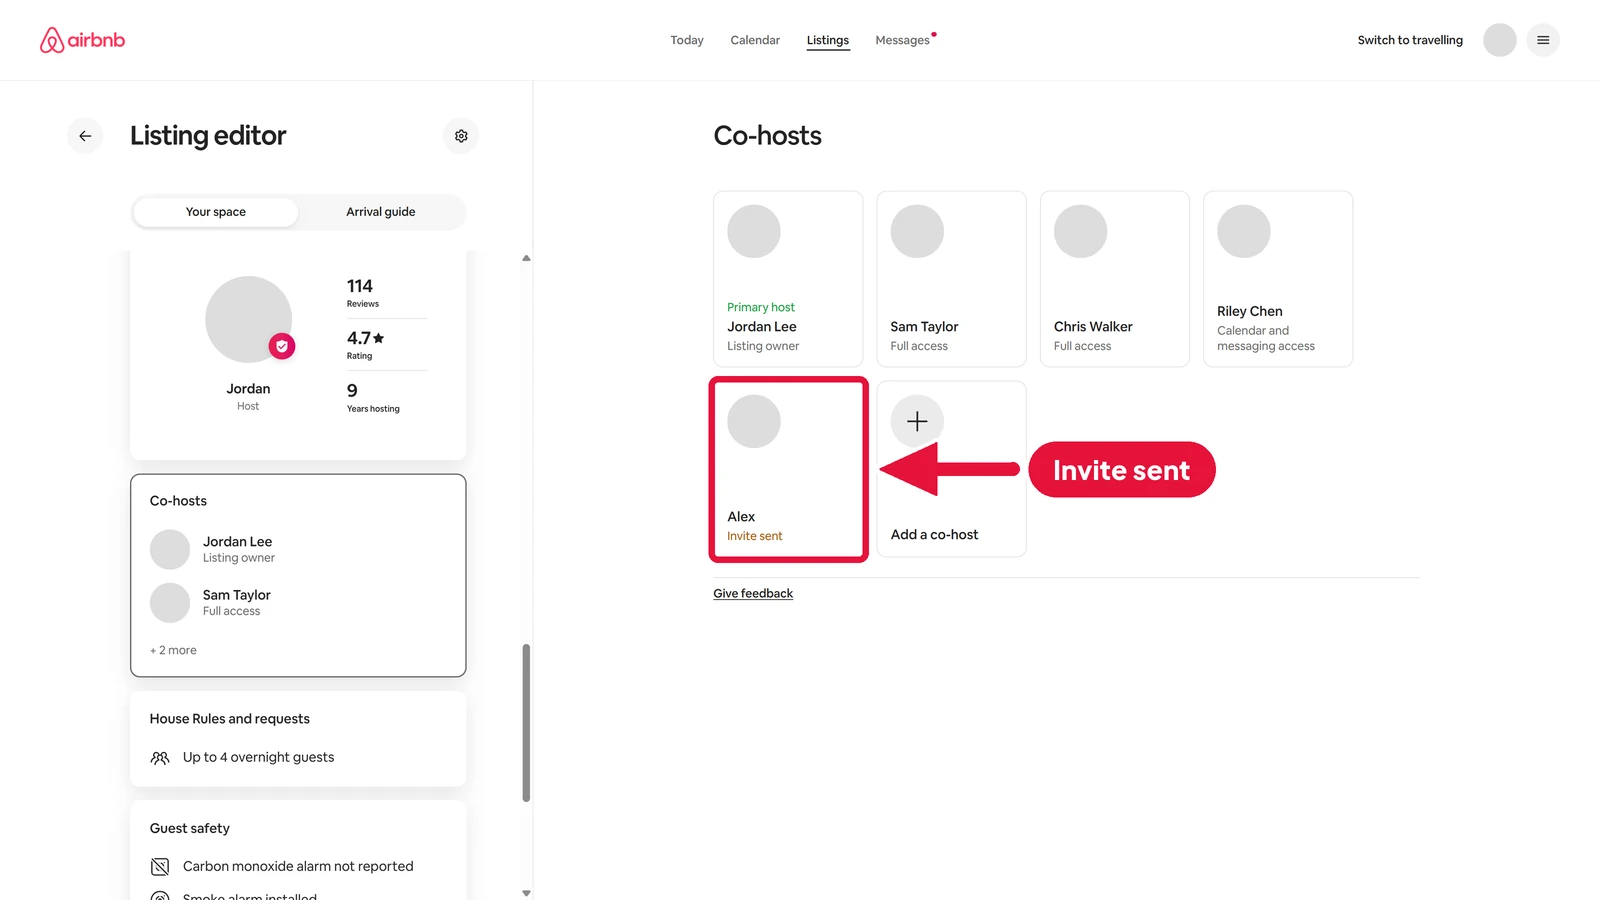
This page shows everyone who already helps you, and what each person is allowed to do. To bring someone new on board, click Add a co-host.
Step 2: Invite your co-host
#-
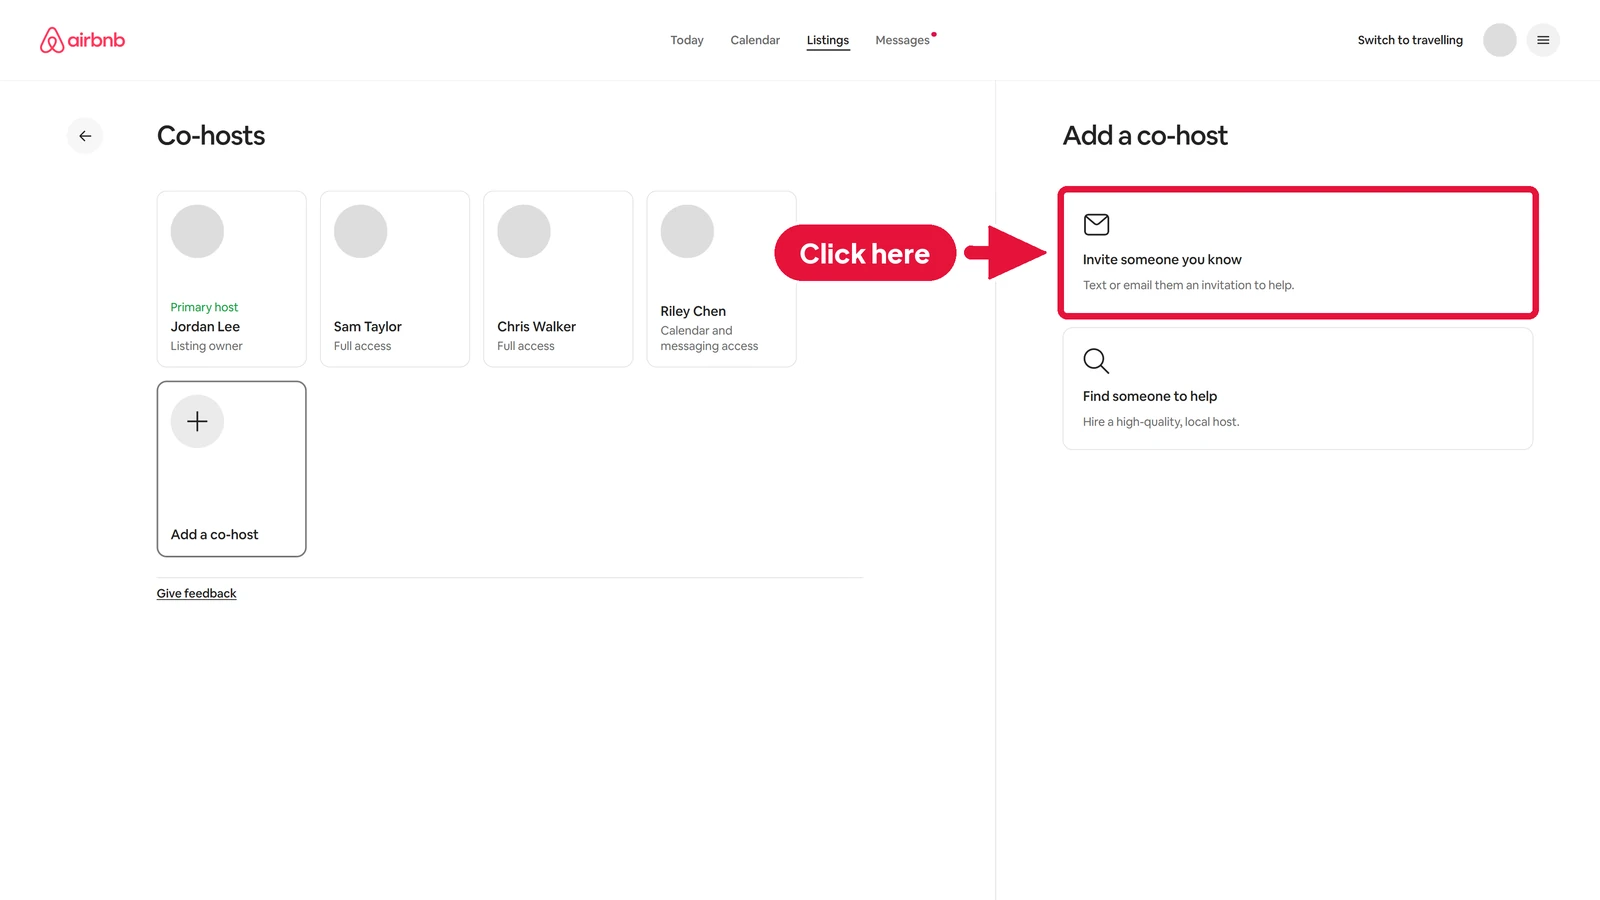
Click Invite someone you know. Airbnb will text or email them an invitation. The other choice, Find someone to help, is for hiring a local host.
-
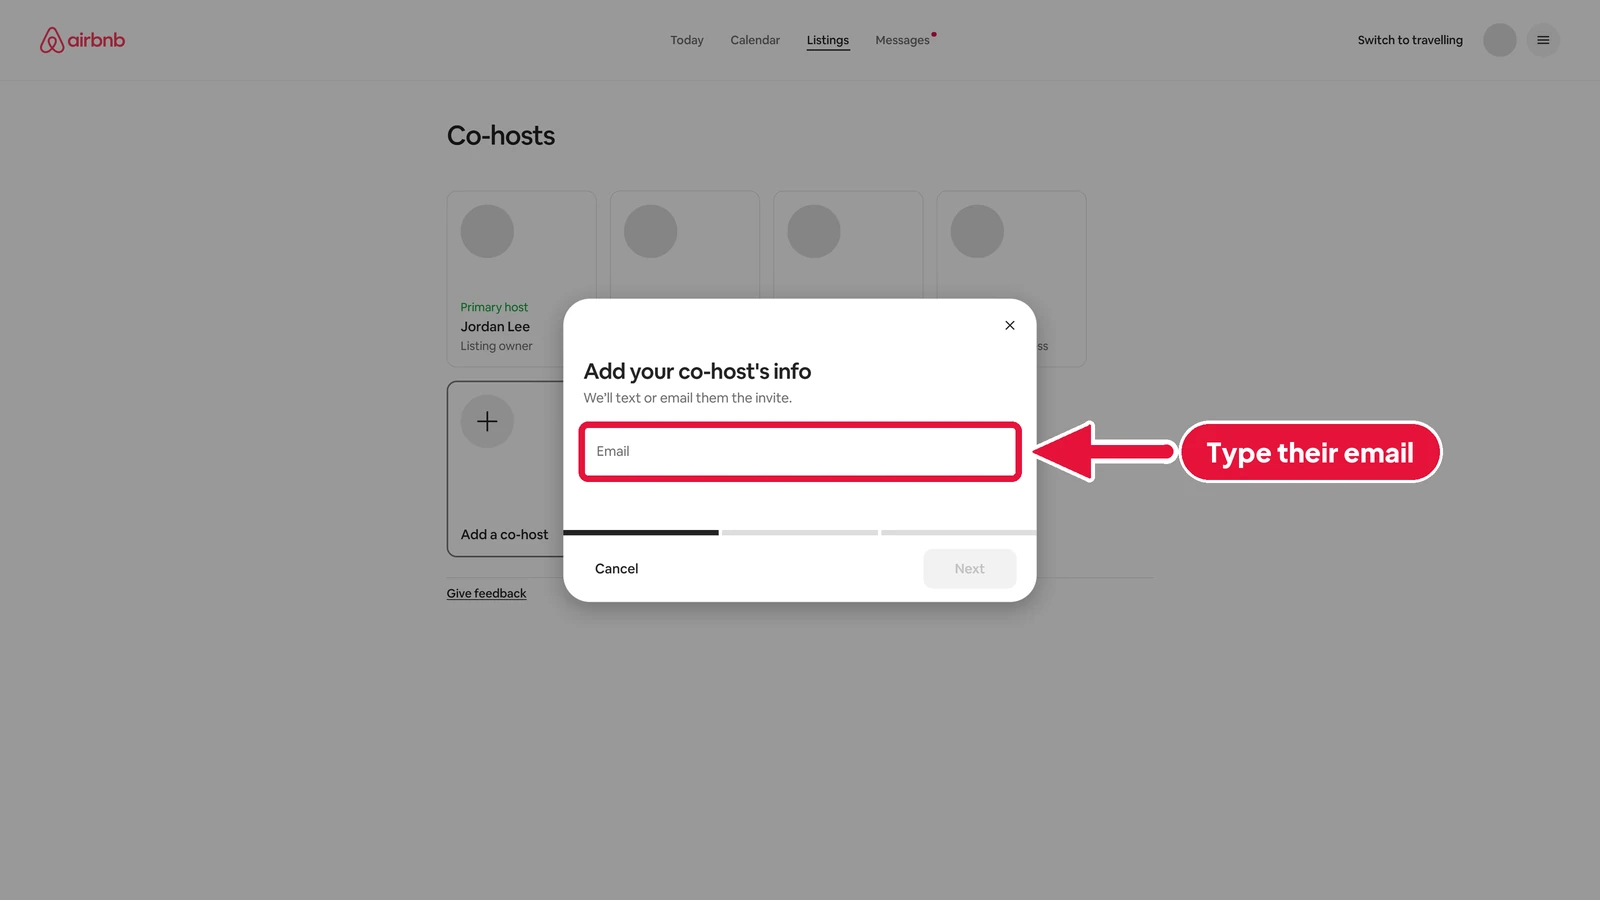
Type your co-host's email address into the Email box.
-
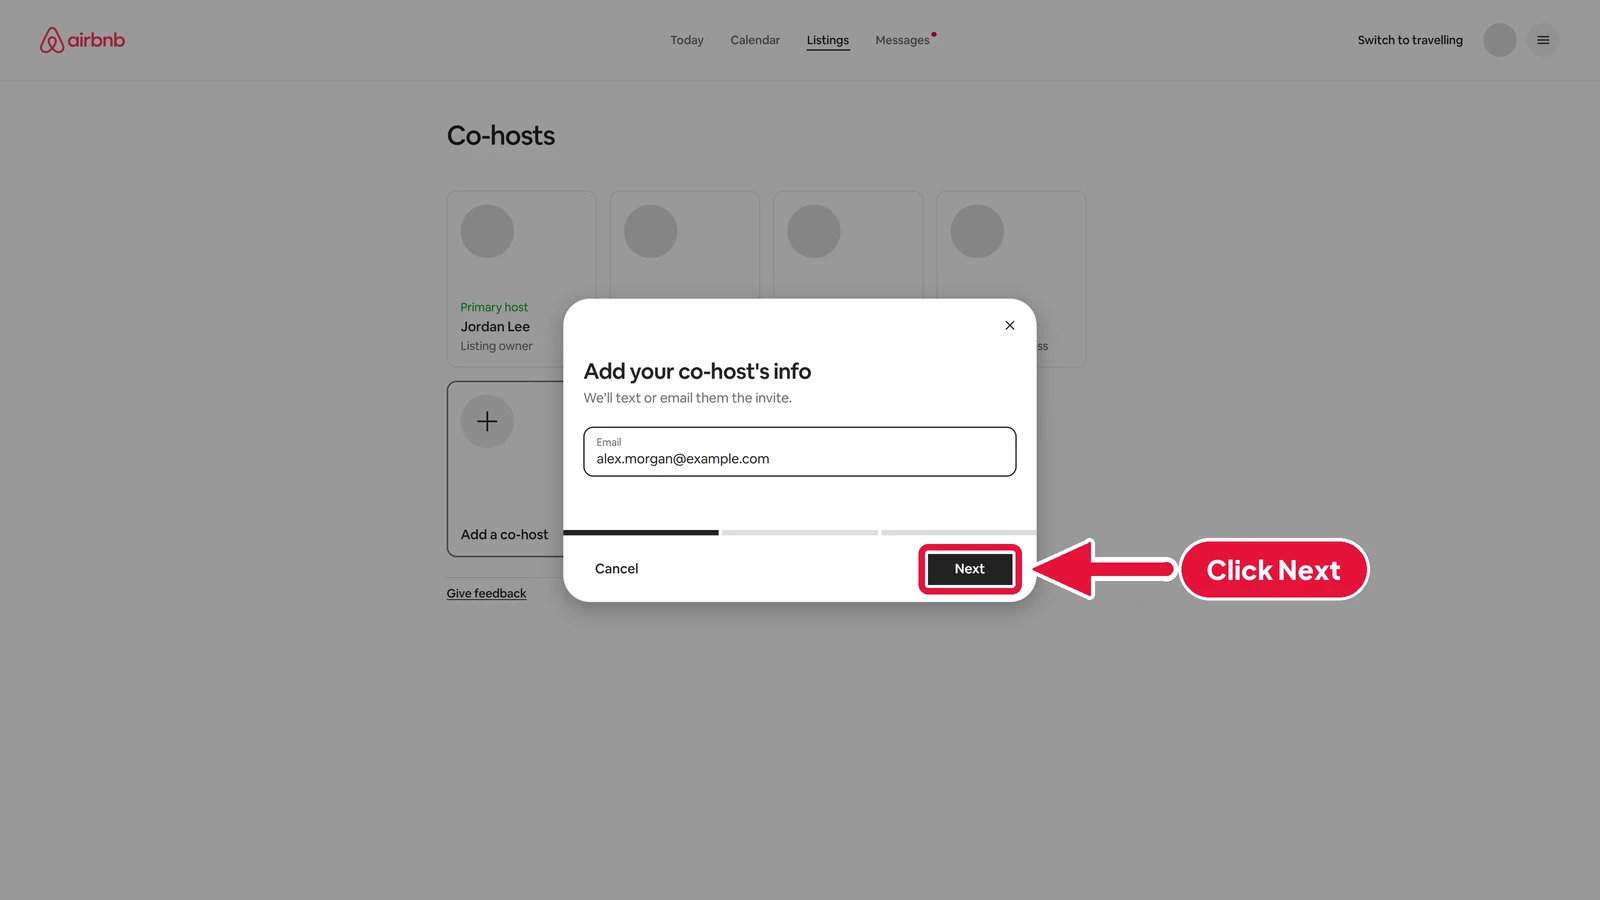
With their email typed in, click Next.
Step 3: Choose permissions
#-
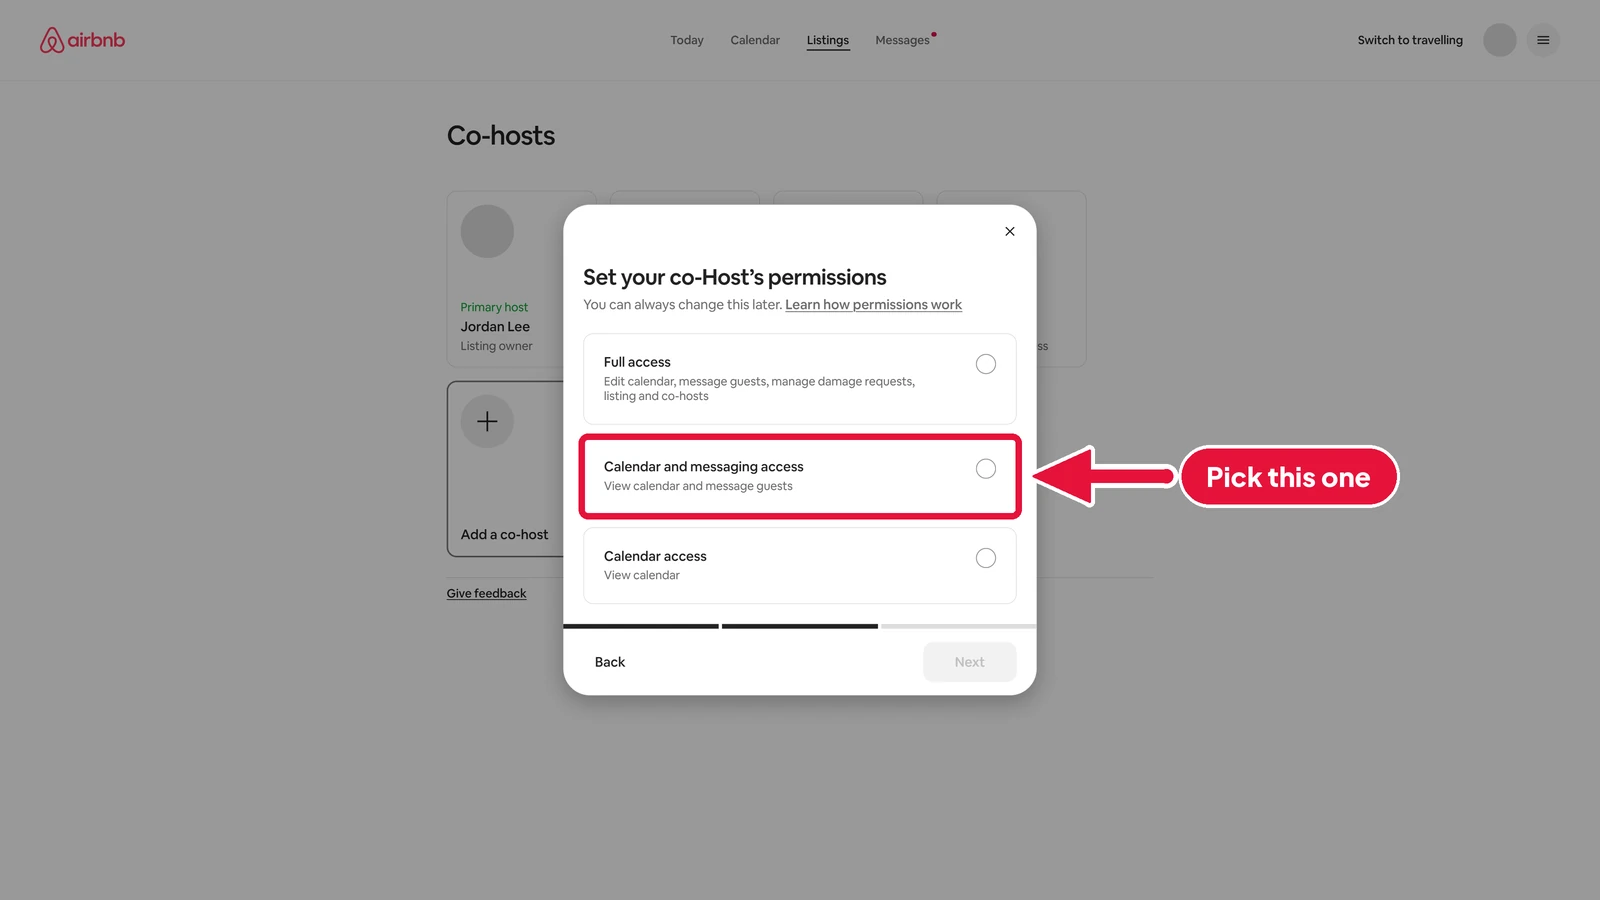
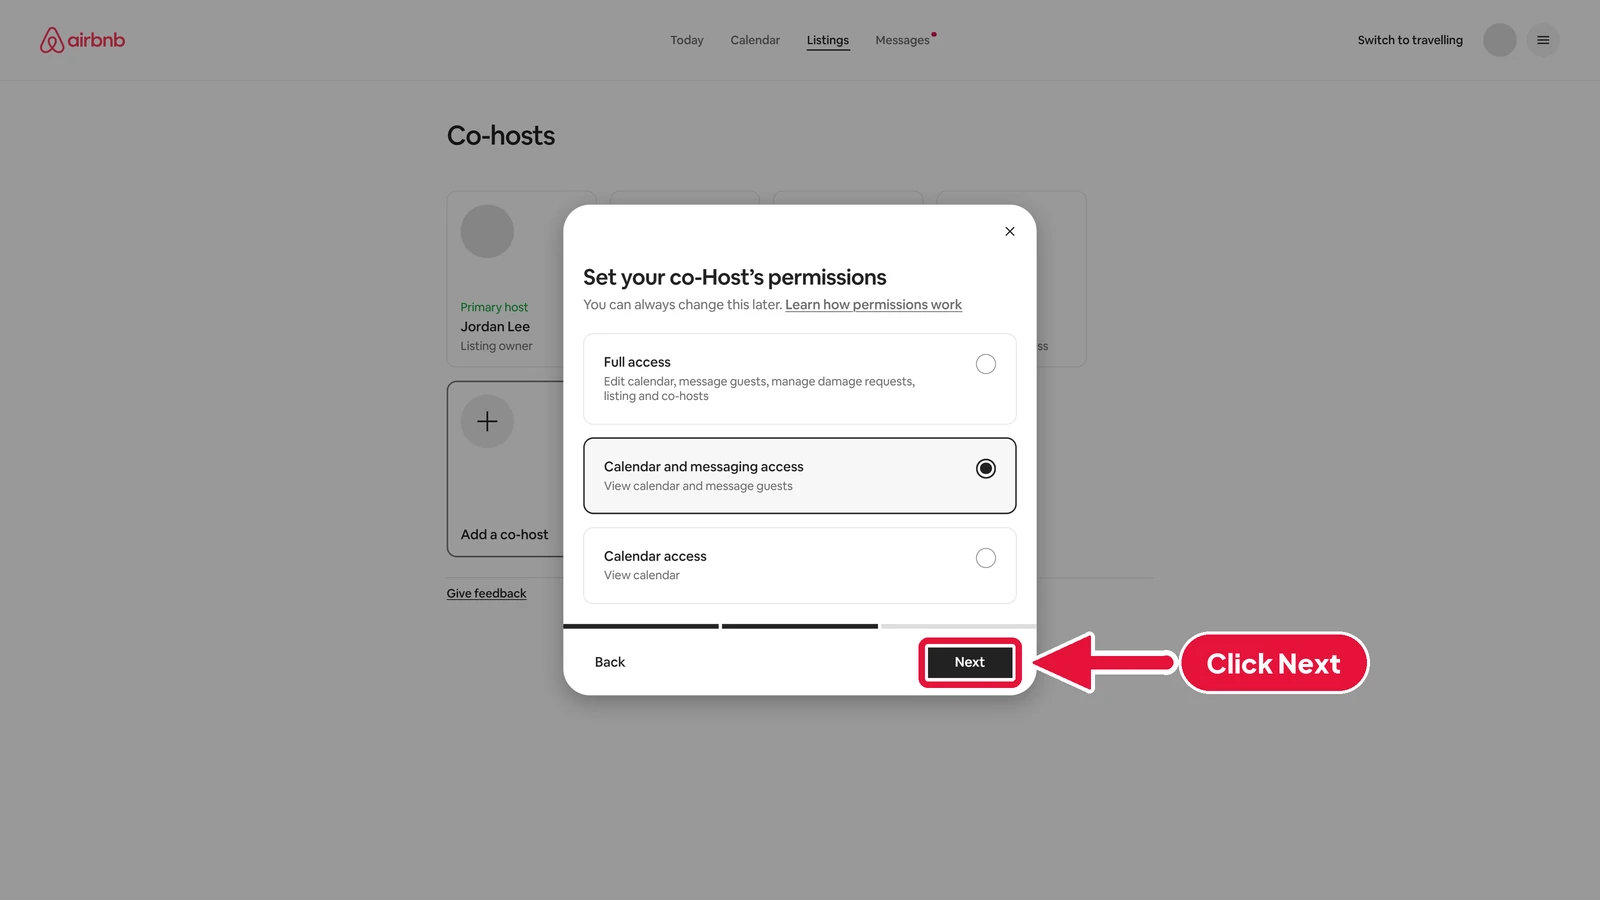
Airbnb asks how much your co-host is allowed to do. Full access lets them edit your calendar, message guests, and manage damage requests, your listing and your co-hosts. Calendar and messaging access lets them view your calendar and message guests. Calendar access lets them view your calendar. You can always change this later.
-
We'll pick Calendar and messaging access, so your co-host can answer guests and look after your calendar.
-
Click Next, down in the bottom right corner.
Step 4: Send the invite
#-
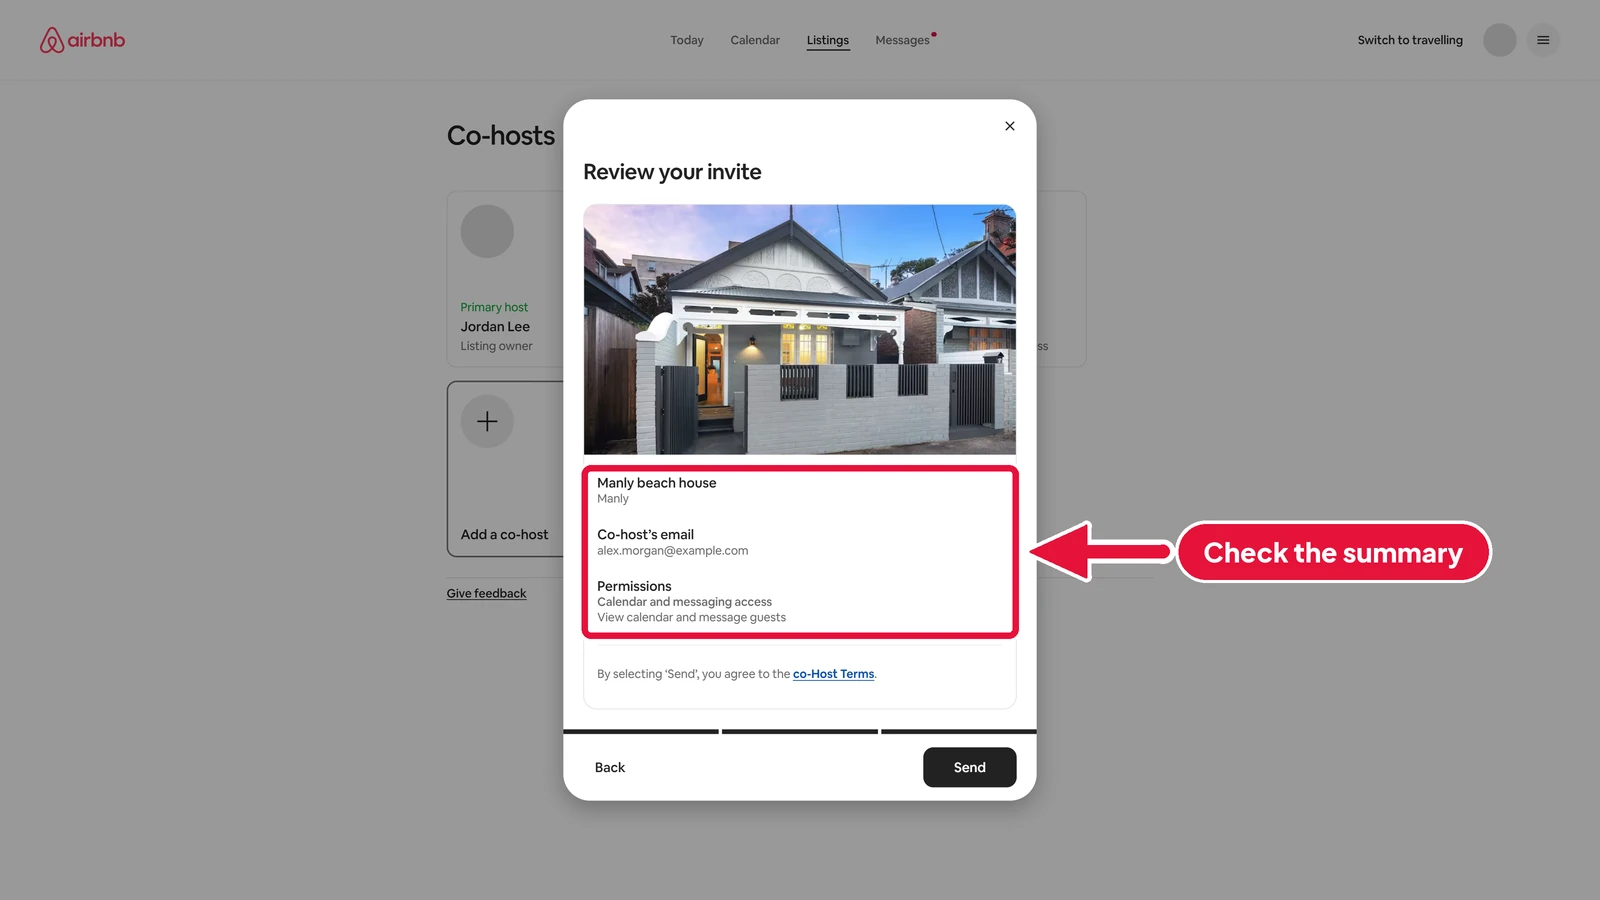
Review your invite shows a summary, with the listing, your co-host's email, and their permissions. Check that all three are right.
-
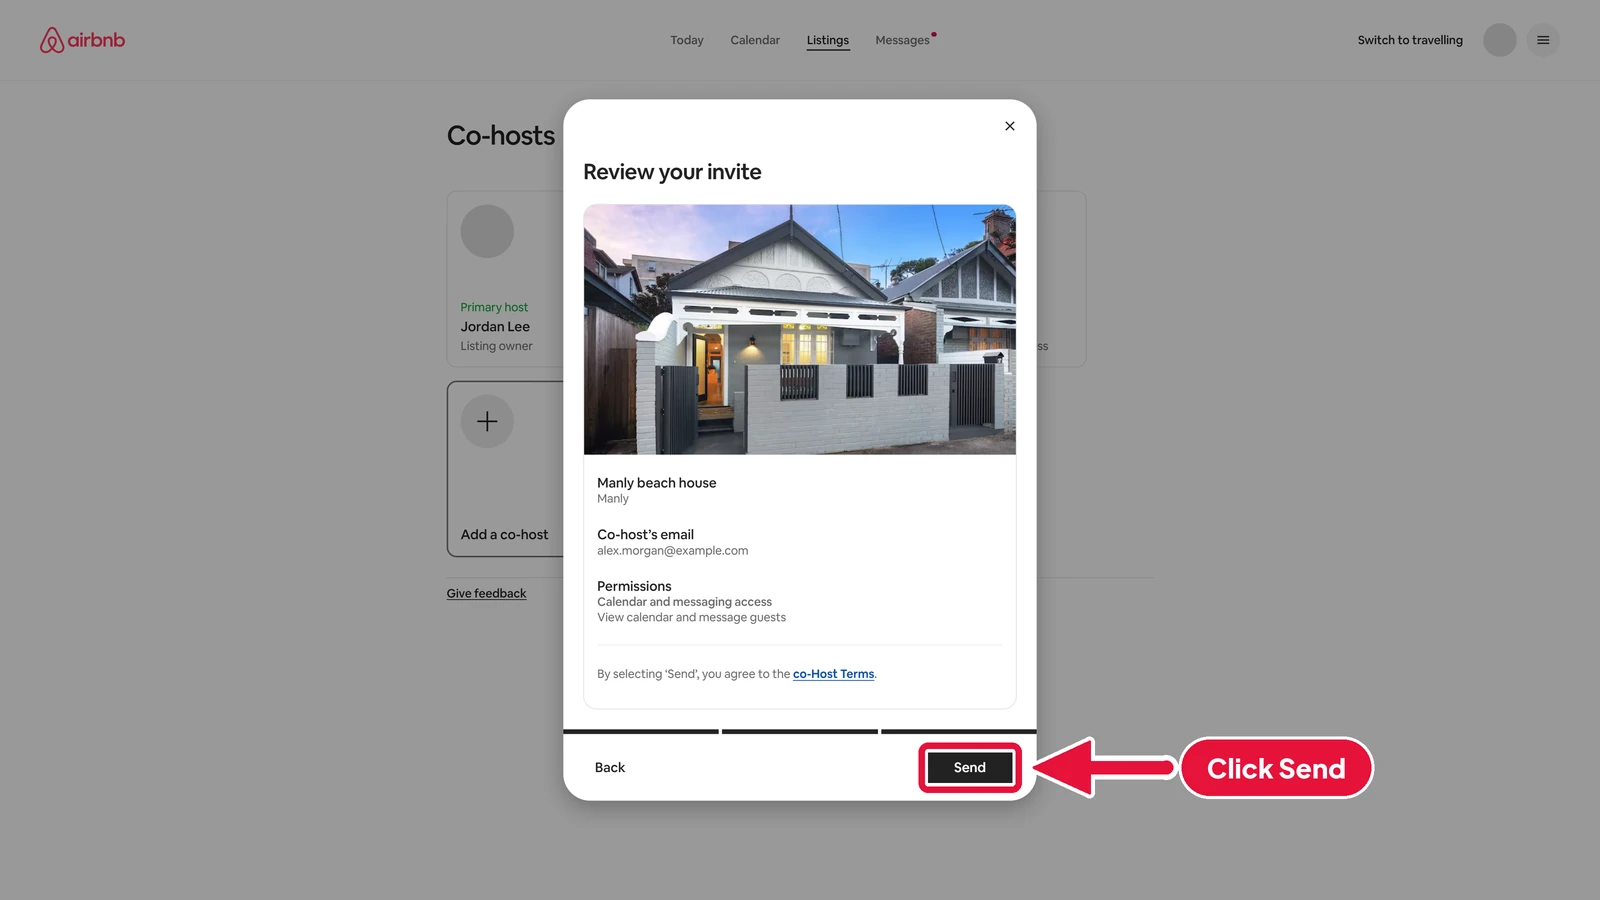
Click Send. By sending, you agree to Airbnb's co-Host Terms.
-
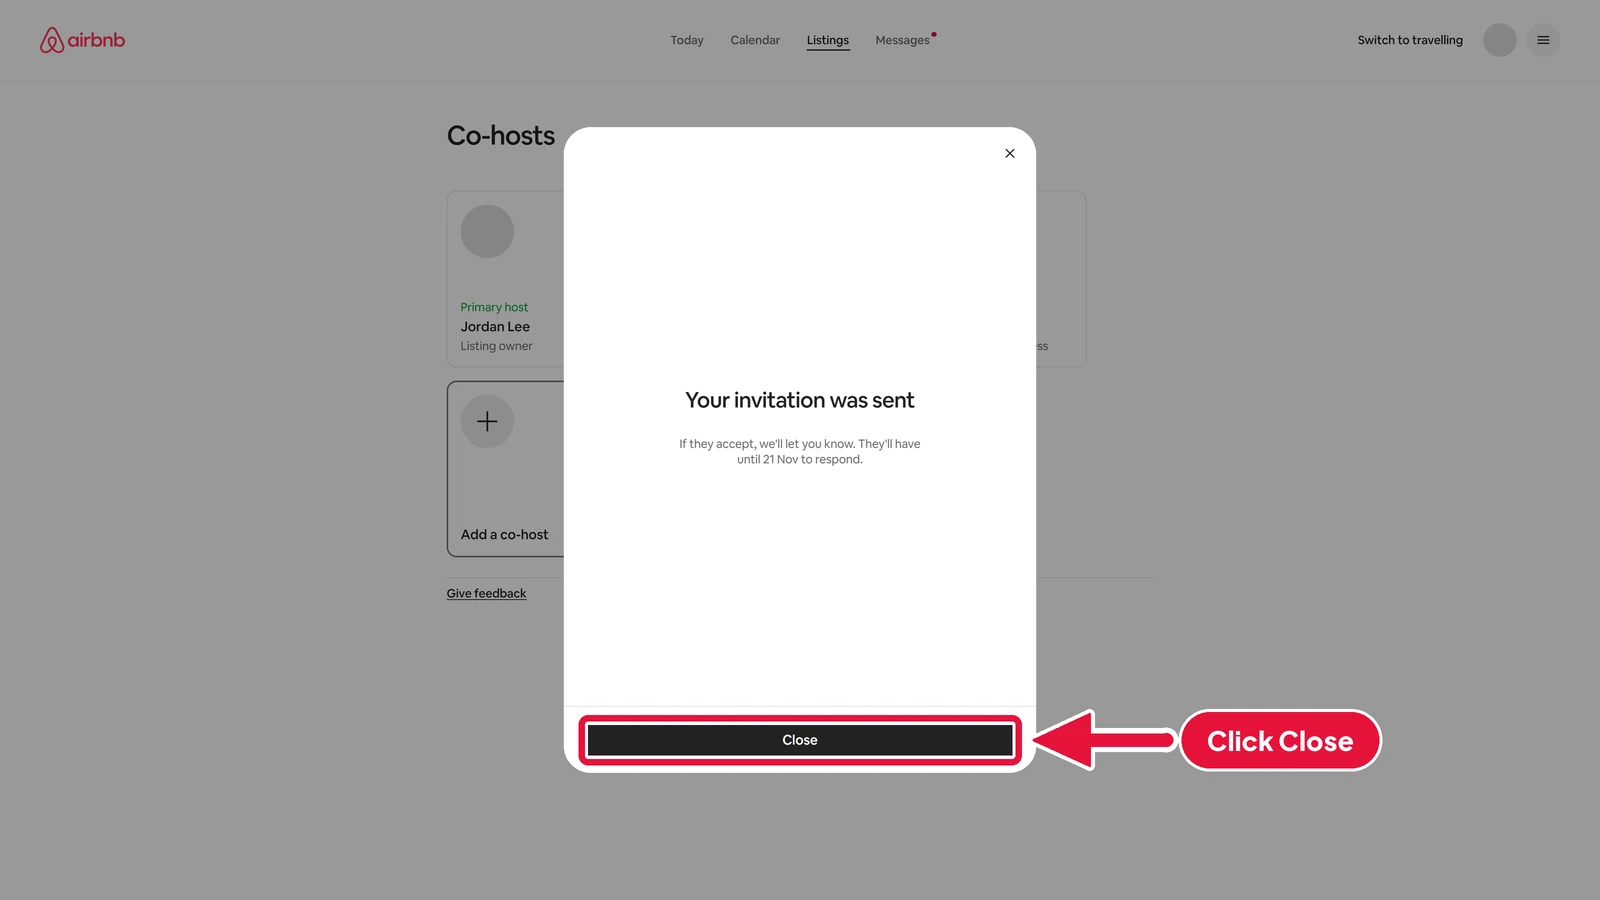
Your invitation was sent appears. If your co-host accepts, Airbnb will let you know, and they have two weeks to accept. Click Close.
-
Back on the Co-hosts page, your new co-host shows as Invite sent, until they say yes.
The catch: Airbnb only adds co-hosts on Airbnb
#A co-host you add on Airbnb only helps with your Airbnb listings. If you're also on Vrbo or Booking.com, you would have to add your co-host again on each site. Juggling a co-host across every site is a real pain.
With Host Port, you add your co-host once. They can then help on every site, from one place. Here's how.
Step 5: Open your Host Port team
#-
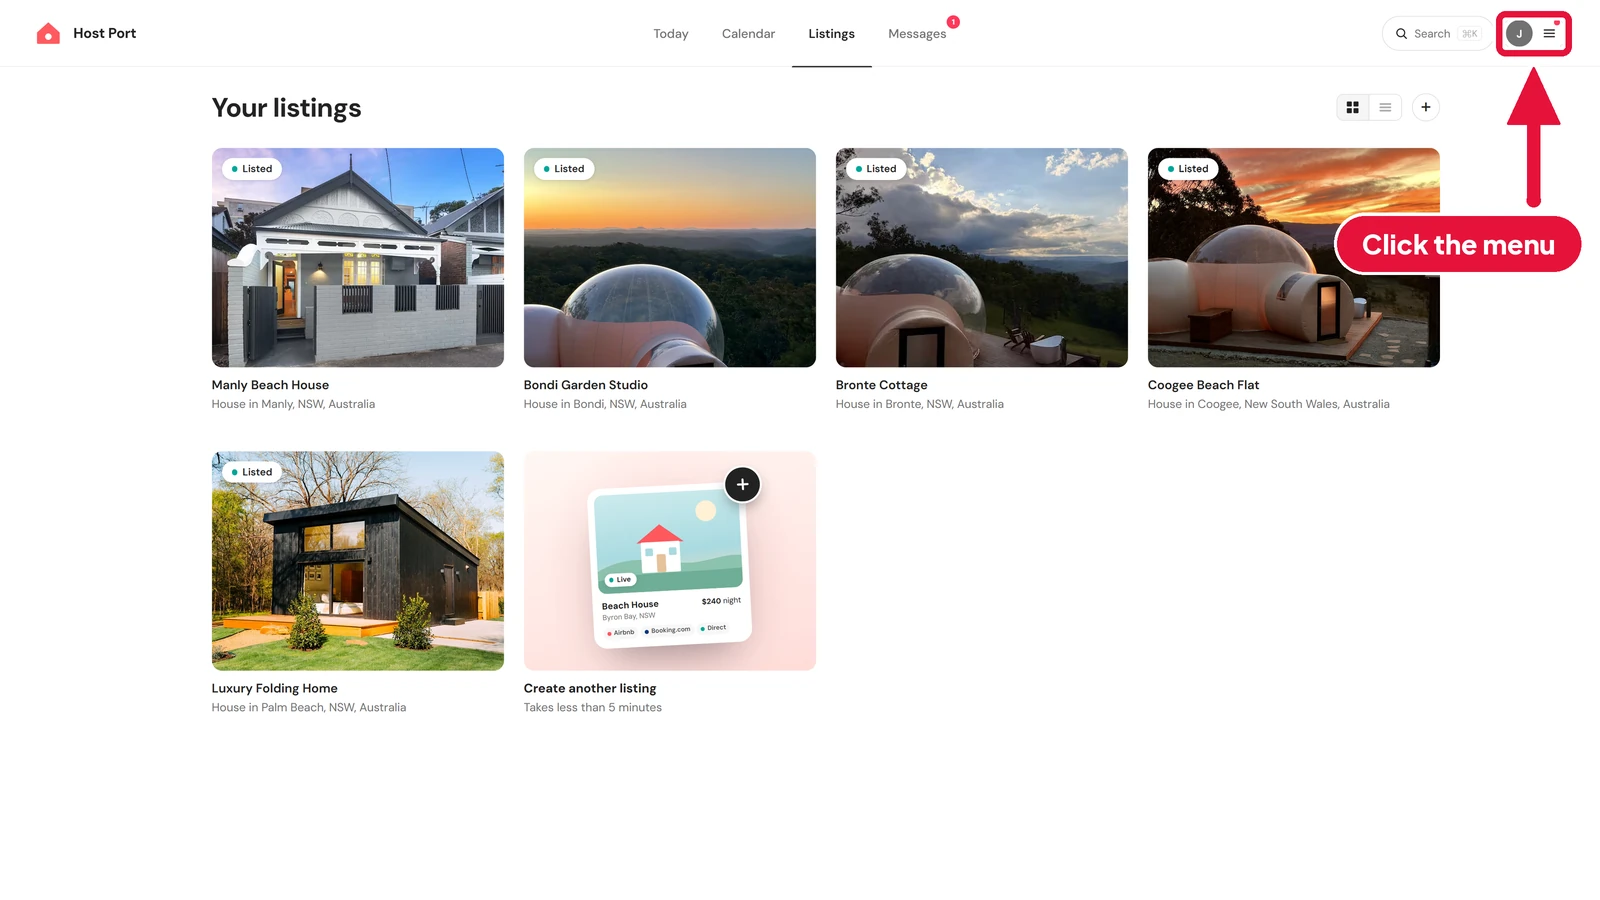
In Host Port, click the menu in the top right corner. It's the button with three lines and your profile picture.
-
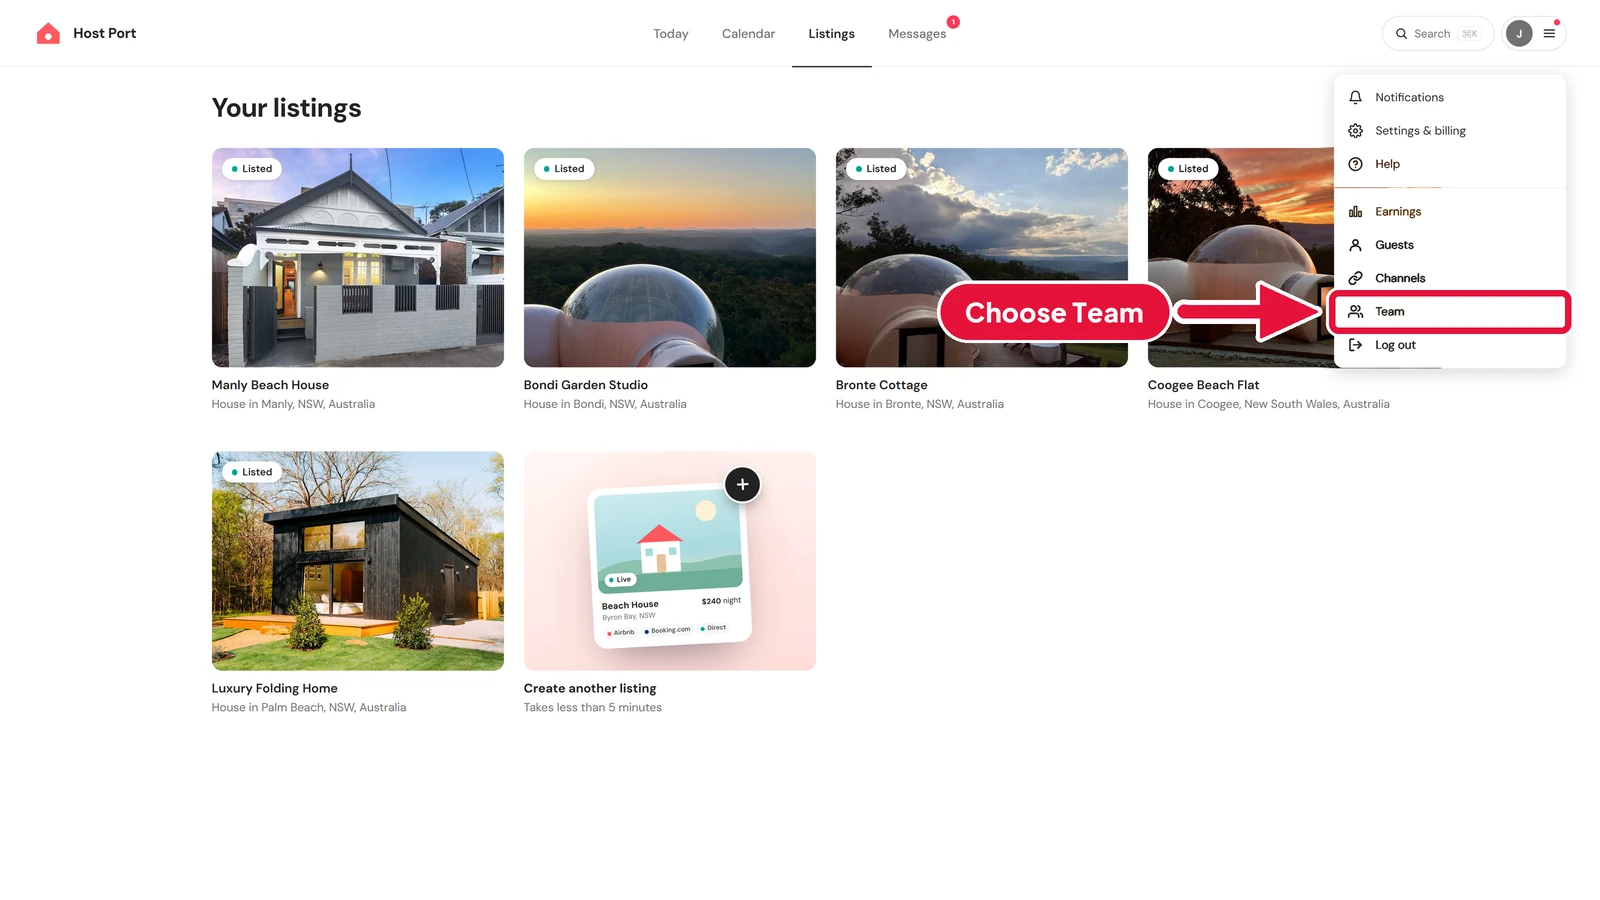
From the menu that opens, choose Team.
-
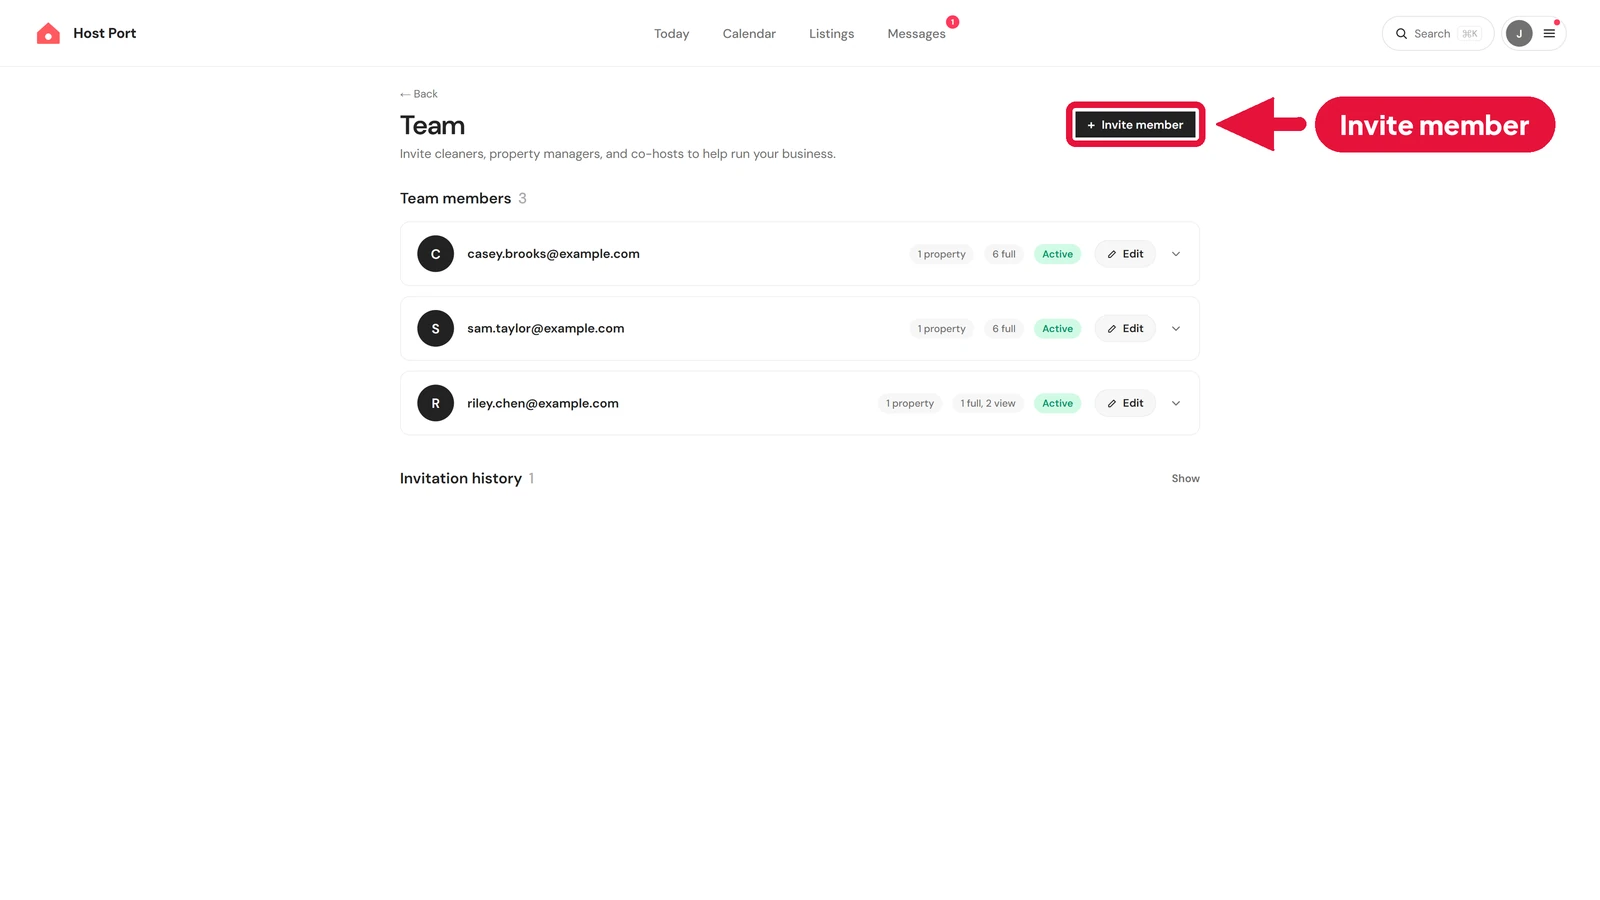
The Team page is for the people who help run your business. To bring your co-host on board, click Invite member.
Step 6: Invite them once
#-
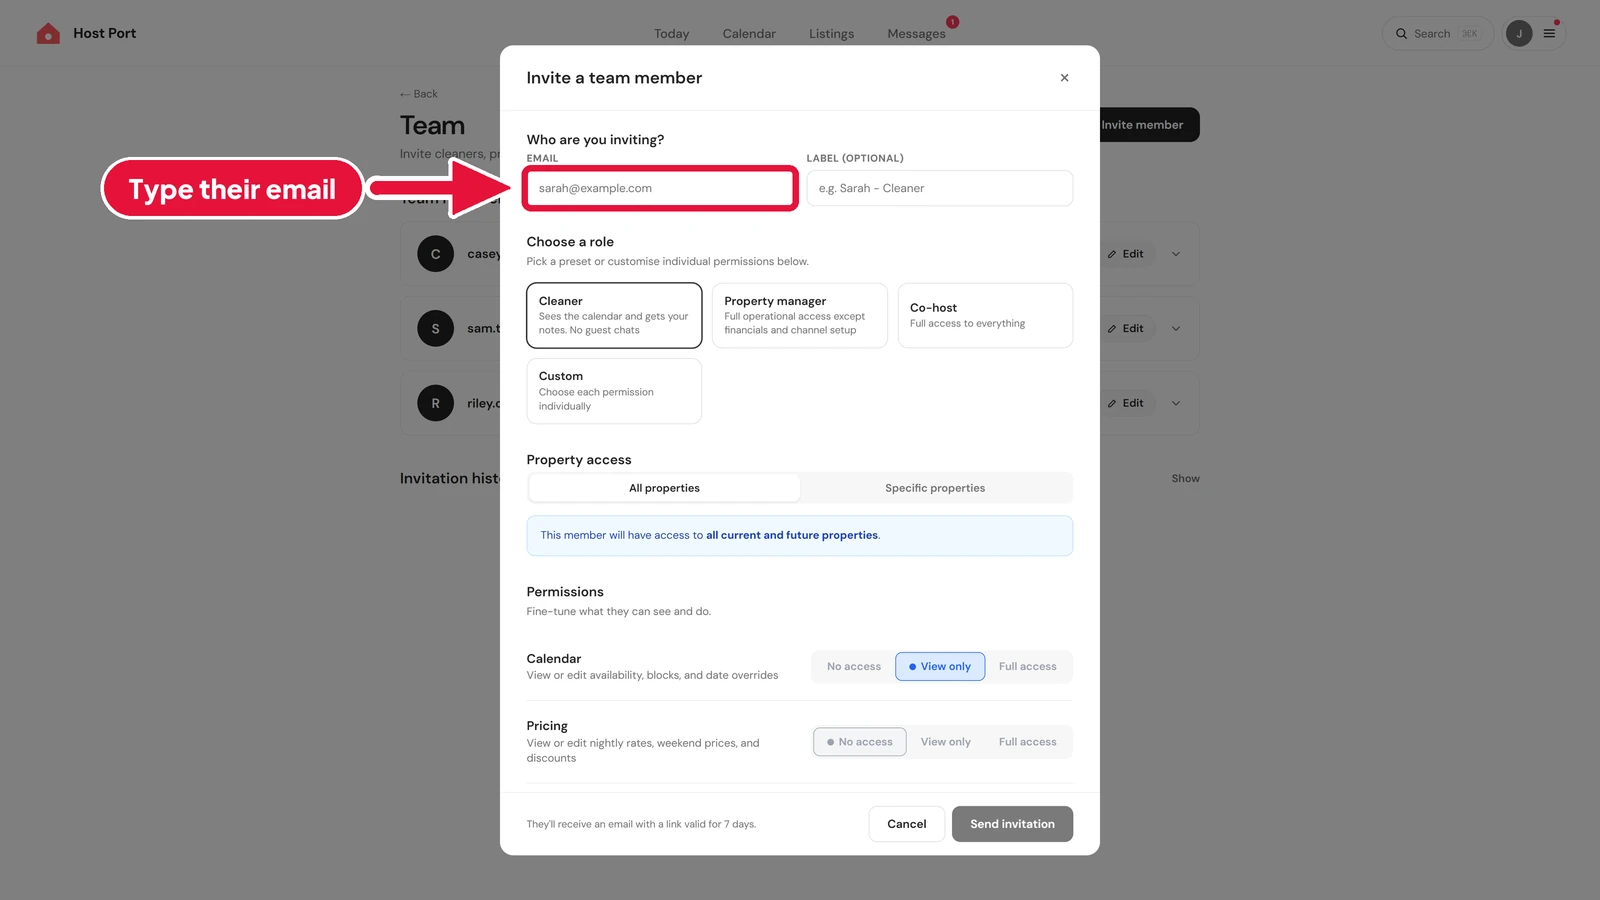
In the Invite a team member box, type your co-host's email address into the Email box, just like before. You can leave Label (optional) empty.
-
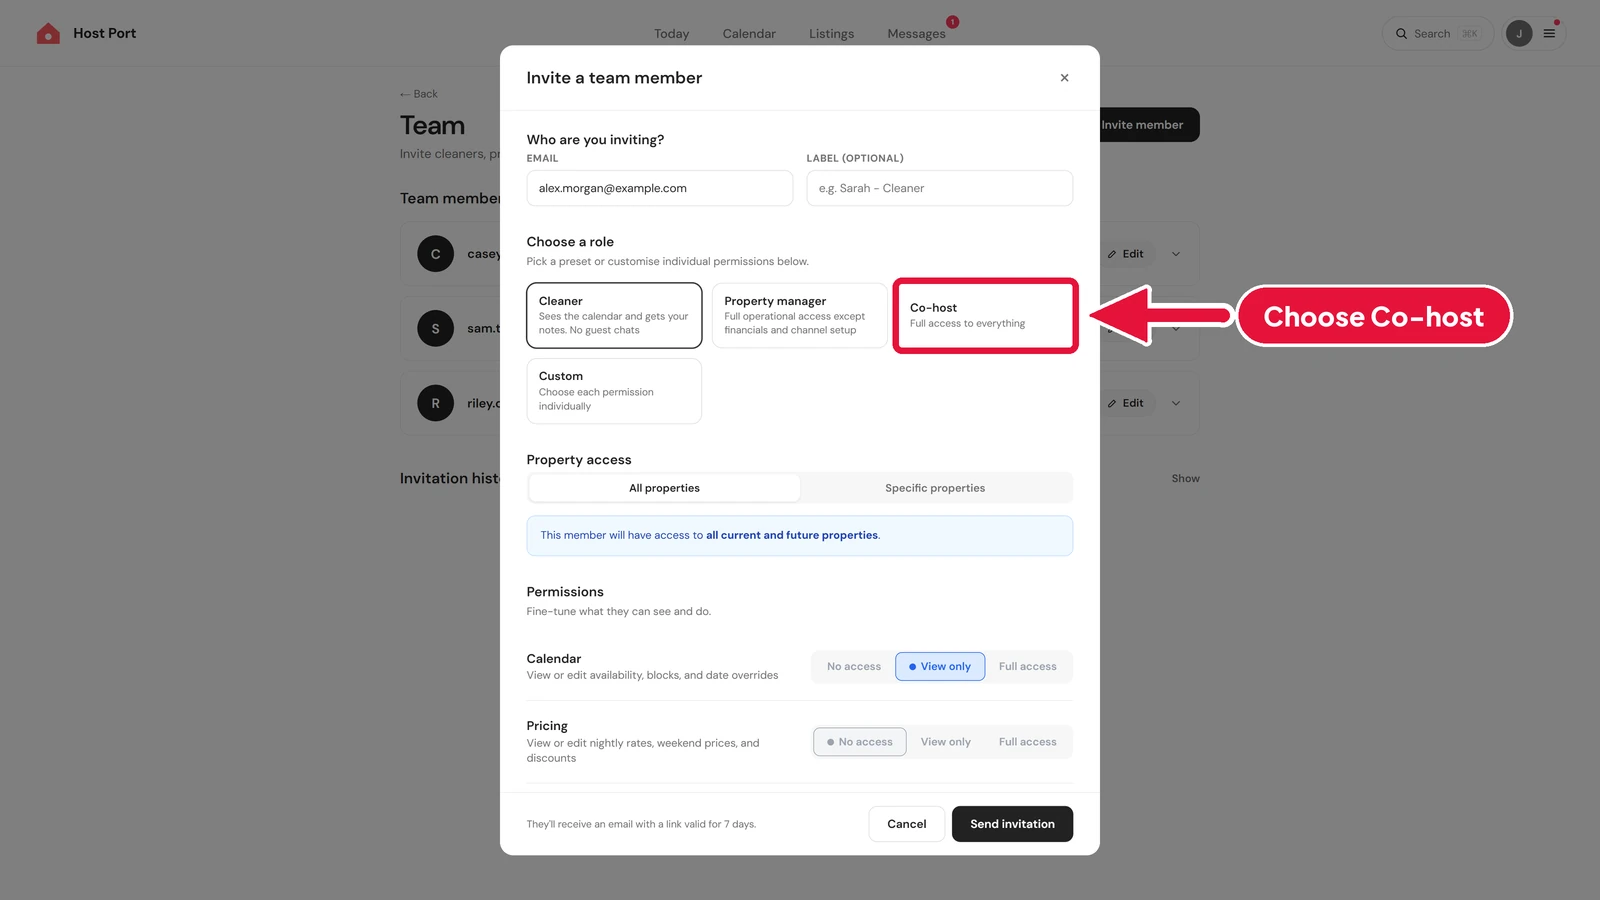
Under Choose a role, choose Co-host. The Co-host role gives them full access to everything.
-
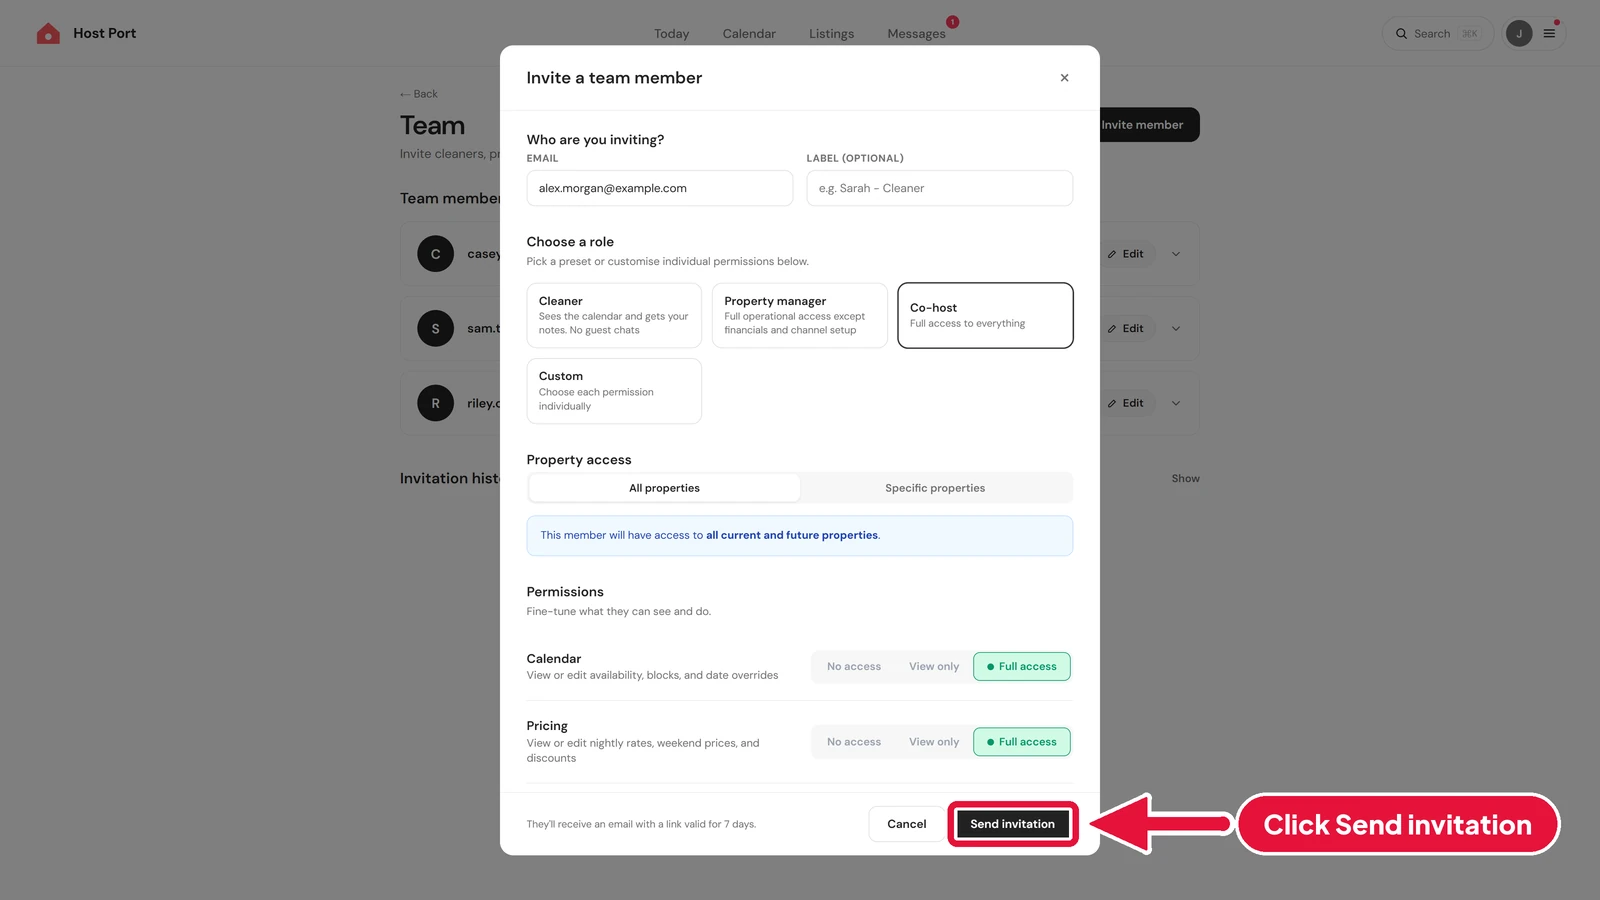
When you're happy, click Send invitation. Your co-host gets an email with a link that works for 7 days.
-
Your co-host gets that email straight away. Under Pending invitations, they show as Pending until they accept.
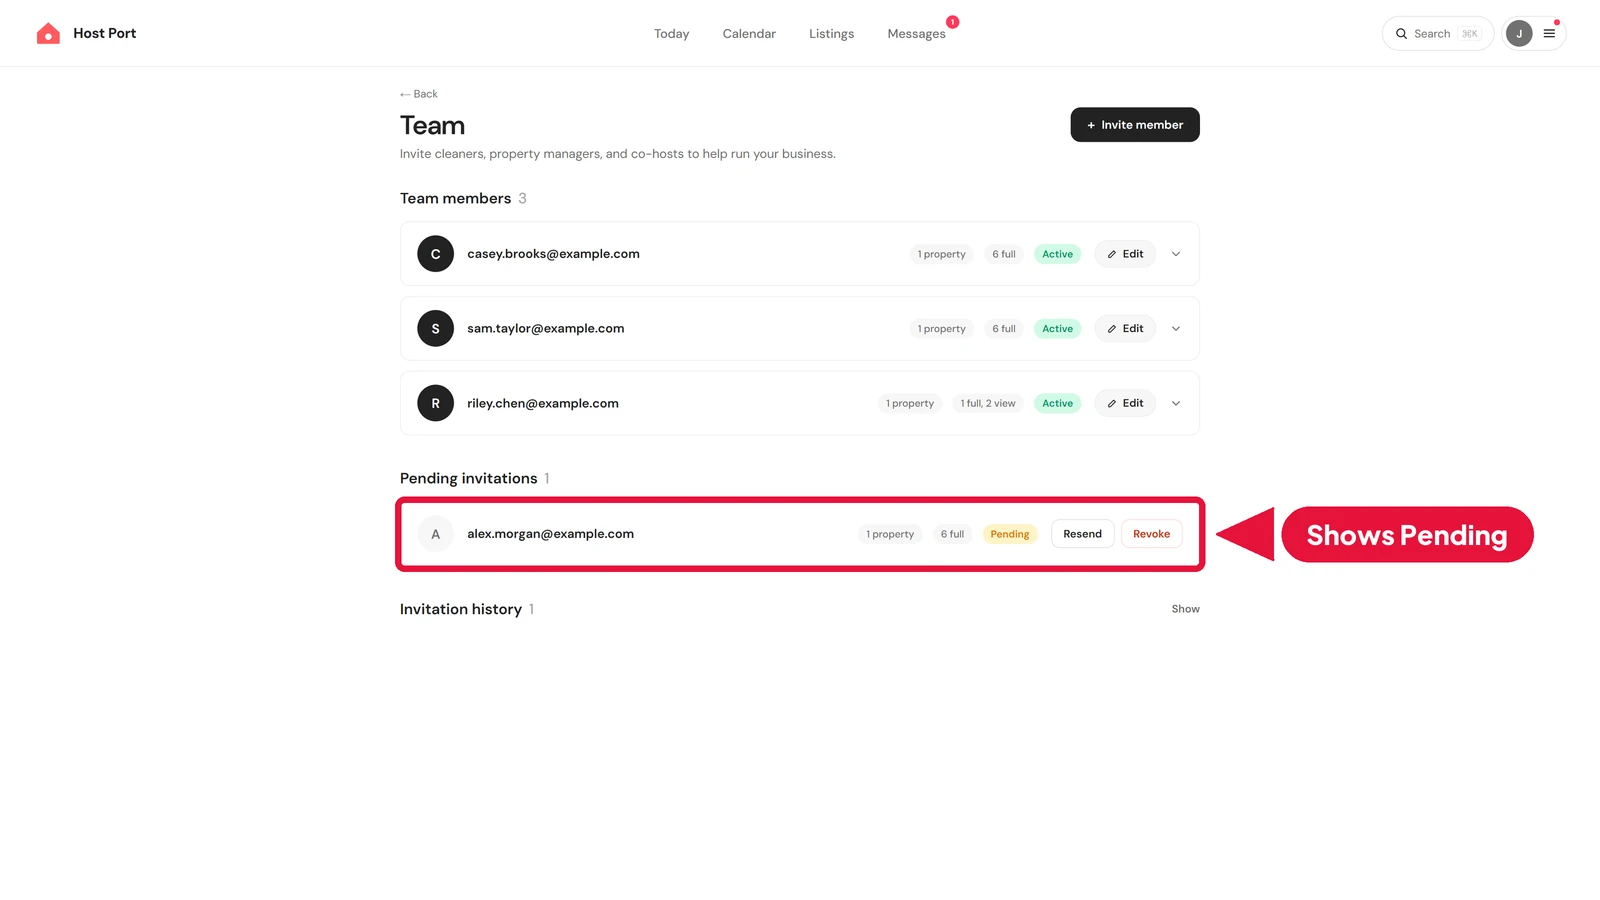
That's it. As soon as they accept, your co-host can start helping on every site you use.
Flat pricing, no contract, no sales call.
Host Port syncs your calendars with Airbnb, Booking.com and Vrbo and gives every listing a direct booking page. That part is free: unlimited listings, no card, no time limit. Two-way channel sync is $10 USD per listing per month, and it puts guest messages from your connected channels in one inbox.